PyNVVL:NVIDIA视频加载器(NVVL)的Python封装,与CuPy兼容

项目描述
PyNVVL


PyNVVL是NVIDIA视频加载器(NVVL)的薄封装NVIDIA Video Loader (NVVL)。此软件包使您能够将视频直接加载到GPU内存中,并以零拷贝的方式访问它们作为CuPy ndarrays。PyNVVL的预构建二进制文件包括NVVL本身,因此您无需安装NVVL。
要求
- CUDA 8.0, 9.0, 9.1, 或 9.2
- Python 2.7.6+, 3.4.7+, 3.5.1+, 或 3.6.0+
- CuPy v4.5.0
测试环境
- Ubuntu 16.04
- Python 2.7.6+, 3.4.7+, 3.5.1+, 和 3.6.0+
- CUDA 8.0, 9.0, 9.1, 和 9.2
安装预构建二进制文件
请根据您的CUDA版本选择正确的软件包。
# [For CUDA 8.0]
pip install pynvvl-cuda80

# [For CUDA 9.0]
pip install pynvvl-cuda90

# [For CUDA 9.1]
pip install pynvvl-cuda91

# [For CUDA 9.2]
pip install pynvvl-cuda92
用法
import pynvvl
import matplotlib.pyplot as plt

# Create NVVLVideoLoader object
loader = pynvvl.NVVLVideoLoader(device_id=0, log_level='error')

# Show the number of frames in the video
n_frames = loader.frame_count('examples/sample.mp4')
print('Number of frames:', n_frames)

# Load a video and return it as a CuPy array
video = loader.read_sequence(
    'examples/sample.mp4',
    horiz_flip=True,
    scale_height=512,
    scale_width=512,
    crop_y=60,
    crop_height=385,
    crop_width=512,
    scale_method='Linear',
    normalized=True
)

print(video.shape)  # => (91, 3, 385, 512): (n_frames, channels, height, width)
print(video.dtype)  # => float32

# Get the first frame as numpy array
frame = video[0].get()
frame = frame.transpose(1, 2, 0)

plt.imshow(frame)
plt.savefig('examples/sample.png')
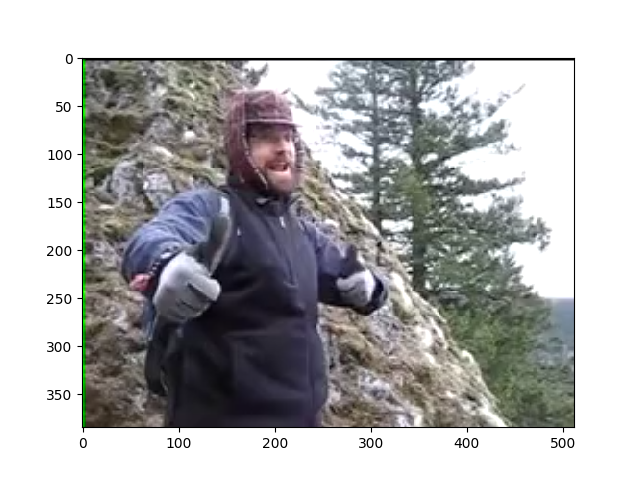
此视频来自Moments-In-Time数据集的flickr-2-6-3-3-5-2-7-6-5626335276_4.mp4。
请注意,裁剪是在缩放之后执行的。在上面的示例中,NVVL首先将256 x 256缩放为512 x 512,然后裁剪区域[60:60 + 385, 0:512]。有关转换选项的更多信息,请参阅以下部分。
VideoLoader选项
当您创建一个NVVLVideoLoader对象时,请指定GPU设备ID。您还可以使用构造函数的log_level参数指定NVVLVideoLoader的日志级别。
Wrapper of NVVL VideoLoader

    Args:
        device_id (int): Specify the device id used to load a video.
        log_level (str): Logging level which should be either 'debug',
            'info', 'warn', 'error', or 'none'.
            Logs with levels >= log_level is shown. The default is 'warn'.
转换选项
pynvvl.NVVLVideoLoader.read_sequence可以接受一些选项来指定色彩空间、值范围以及您想对视频执行哪些转换。
Loads the video from disk and returns it as a CuPy ndarray.

    Args:
        filename (str): The path to the video.
        frame (int): The initial frame number of the returned sequence.
            Default is 0.
        count (int): The number of frames of the returned sequence.
            If it is None, whole frames of the video are loaded.
        channels (int): The number of color channels of the video.
            Default is 3.
        scale_height (int): The height of the scaled video.
            Note that scaling is performed before cropping.
            If it is 0 no scaling is performed. Default is 0.
        scale_width (int): The width of the scaled video.
            Note that scaling is performed before cropping.
            If it is 0, no scaling is performed. Default is 0.
        crop_x (int): Location of the crop within the scaled frame.
            Must be set such that crop_y + height <= original height.
            Default is 0.
        crop_y (int): Location of the crop within the scaled frame.
            Must be set such that crop_x + width <= original height.
            Default is 0.
        crop_height (int): The height of cropped region of the video.
            If it is None, no cropping is performed. Default is None.
        crop_width (int): The width of cropped region of the video.
            If it is None, no cropping is performed. Default is None.
        scale_method (str): Scaling method. It should be either of
            'Nearest' or 'Lienar'. Default is 'Linear'.
        horiz_flip (bool): Whether horizontal flipping is performed or not.
            Default is False.
        normalized (bool): If it is True, the values of returned video is
            normalized into [0, 1], otherwise the value range is [0, 255].
            Default is False.
        color_space (str): The color space of the values of returned video.
            It should be either 'RGB' or 'YCbCr'. Default is 'RGB'.
        chroma_up_method (str): How the chroma channels are upscaled from
            yuv 4:2:0 to 4:4:4. It should be 'Linear' currently.
        out (cupy.ndarray): Alternate output array where place the result.
            It must have the same shape and the dtype as the expected
            output, and its order must be C-contiguous.
如何构建
使用Docker构建wheel
要求
- Docker
- nvidia-docker (v1/v2)
bash docker/build_wheels.sh
无需Docker设置开发环境
setup.py脚本搜索必要的库。
要求:以下库在LIBRARY_PATH中可用。
- libnvvl.so
- libavformat.so.57
- libavfilter.so.6
- libavcodec.so.57
- libavutil.so.55
您可以在 nvvl 仓库中构建 libnvvl.so。遵循 nvvl 库的说明。build 目录必须在 LIBRARY_PATH 中。
其他三个库在 Ubuntu 16.04 中作为软件包提供。它们安装于 /usr/lib/x86_64-linux-gnu,因此也必须在 LIBRARY_PATH 中。
python setup.py develop
python setup.py bdist_wheel


关闭
pynvvl_cuda80-0.0.3a2-cp36-cp36m-manylinux1_x86_64.whl 的哈希值
| 算法 | 哈希摘要 | |
|---|---|---|
| SHA256 | 4123c69a0b04ac5f1eca84ade2d63e1c493252328278d1915656a514fb16691d |
|
| MD5 | c9cd64000f8392fc8842b84116bcf67b |
|
| BLAKE2b-256 | b498b0dcf71fe33ca72dde21e2a770ba6899c1d5e9e5243fbe80c75c1f61ce55 |
关闭
pynvvl_cuda80-0.0.3a2-cp35-cp35m-manylinux1_x86_64.whl 的哈希值
| 算法 | 哈希摘要 | |
|---|---|---|
| SHA256 | 329f0e463425854666dcdaf86dedd859a3a4b8e2bdb15c10e10c1ef6c3d80284 |
|
| MD5 | 7da76f4ebd063b1e9f751209ac630f8a |
|
| BLAKE2b-256 | 25e9cdbeddbae5a48e99fb6788f95925ac00ae037a38062fc912b7b0aa0dea01 |
关闭
pynvvl_cuda80-0.0.3a2-cp34-cp34m-manylinux1_x86_64.whl 的哈希值
| 算法 | 哈希摘要 | |
|---|---|---|
| SHA256 | 3094b8cd04b976003956901d99441b47692cd9b7372b90571d6bba209ca9a479 |
|
| MD5 | 66b686ff47754384544ec035edc80eda |
|
| BLAKE2b-256 | 751cdf3bb0821fea70421105e51d34e5c01e0c7d538a8695602f650e28db23cb |
关闭
哈希值 用于 pynvvl_cuda80-0.0.3a2-cp27-cp27mu-manylinux1_x86_64.whl
| 算法 | 哈希摘要 | |
|---|---|---|
| SHA256 | 939ad5061f3a8c3ed3bf809567fea04b6c935b7850f904d55a8a268b6cfc5219 |
|
| MD5 | 1bb45508c6583ed0c5691f19e685433f |
|
| BLAKE2b-256 | f41aff4823d3b451030391cb1aab89274082d222674884fe03280ef7b72bab7d |