Python接口到tetgen


项目描述

这个Python库是Hang Si的TetGen C++软件的接口。此模块结合了C++的速度、Python的可移植性和易用性,以及与PyVista的集成,用于3D可视化和分析。有关原始创建者的更多信息,请参阅TetGen的GitHub页面。
此Python库使用TetGen的C++源代码(版本1.6.0,于2020年8月31日发布),托管在libigl/tetgen。
来自Weierstrass Institute Software的简要描述
TetGen是一个用于生成任何3D多面体域四面体网格的程序。TetGen生成精确的约束Delaunay四面体化、边界符合Delaunay网格和Voronoi划分。
TetGen提供各种功能,生成适用于数值方法(如有限元法或有限体积法)的高质量自适应四面体网格。有关TetGen的更多信息,请参阅功能列表。
许可协议(AGPL)
原始的TetGen软件遵循AGPL许可证(参见LICENSE),因此这个Python封装包也必须采用相同的许可证。
在您的下游包中创建到该软件的动态链接之前,请查阅此许可证的条款,并了解商业用途的限制。我们不是律师,不能提供关于此许可证条款的任何指导。
安装
从PyPI安装
pip install tetgen从GitHub源码安装
git clone https://github.com/pyvista/tetgen
cd tetgen
pip install .
基本示例
本模块中实现的C++ TetGen软件的功能主要针对流形三角表面的四面体化。以下基本示例演示了如何四面体化一个流形表面并绘制网格的一部分。
import pyvista as pv
import tetgen
import numpy as np
pv.set_plot_theme('document')

sphere = pv.Sphere()
tet = tetgen.TetGen(sphere)
tet.tetrahedralize(order=1, mindihedral=20, minratio=1.5)
grid = tet.grid
grid.plot(show_edges=True)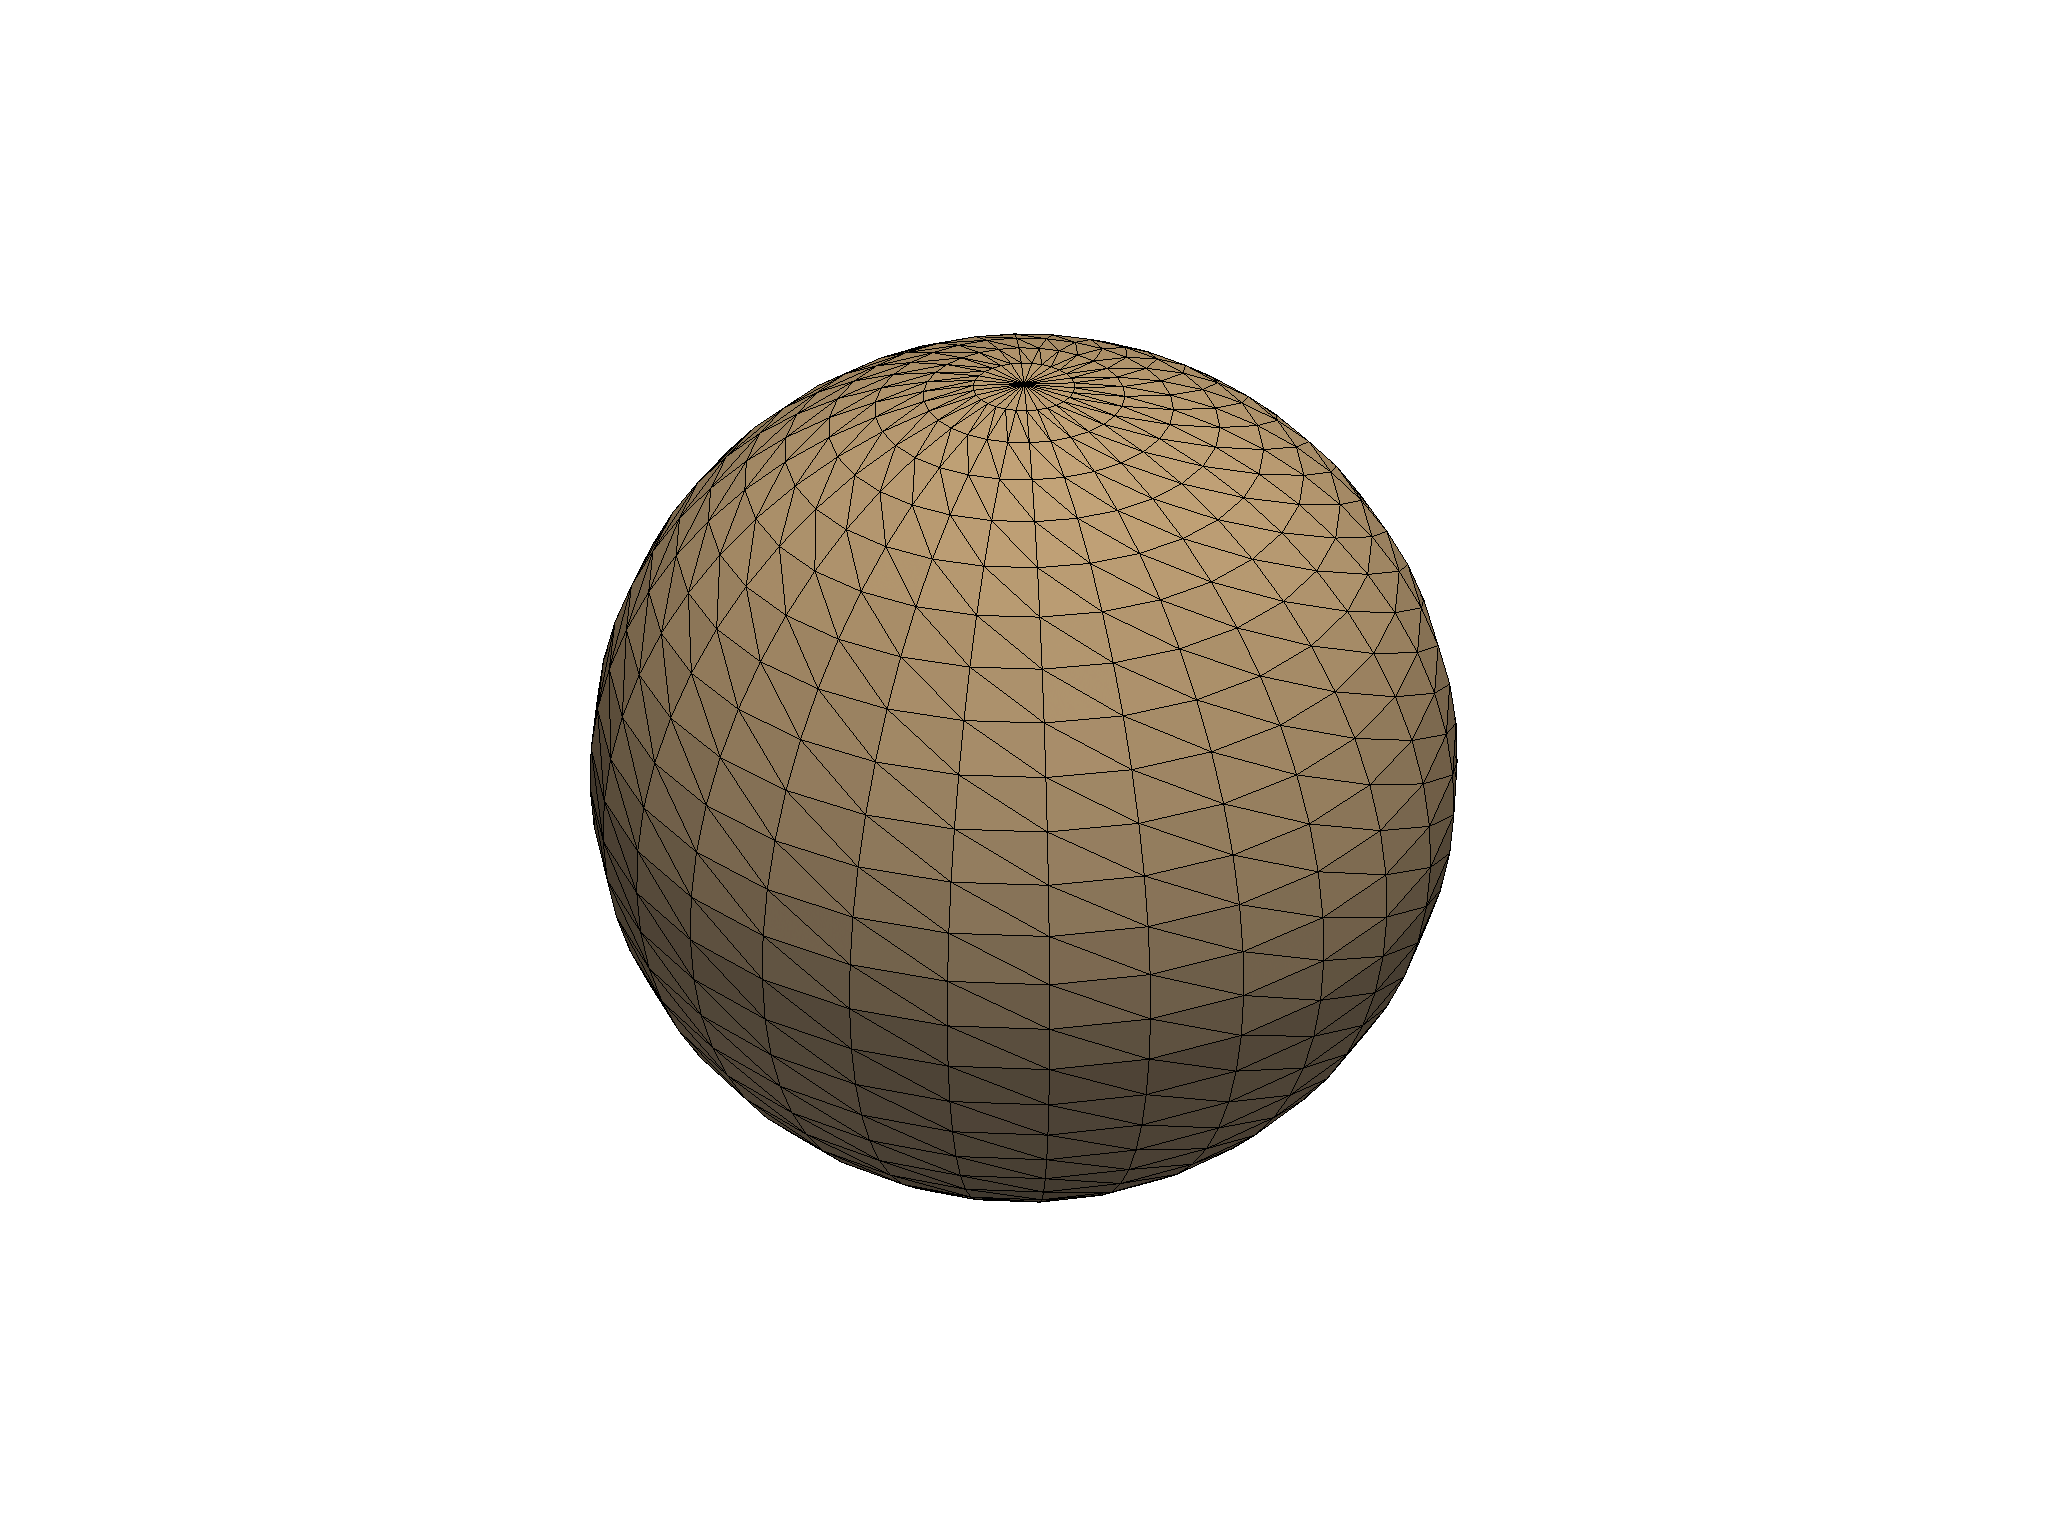
四面体化的球体
从xy平面以下提取球体的四面体网格的一部分,并绘制网格质量。
# get cell centroids
cells = grid.cells.reshape(-1, 5)[:, 1:]
cell_center = grid.points[cells].mean(1)

# extract cells below the 0 xy plane
mask = cell_center[:, 2] < 0
cell_ind = mask.nonzero()[0]
subgrid = grid.extract_cells(cell_ind)

# advanced plotting
plotter = pv.Plotter()
plotter.add_mesh(subgrid, 'lightgrey', lighting=True, show_edges=True)
plotter.add_mesh(sphere, 'r', 'wireframe')
plotter.add_legend([[' Input Mesh ', 'r'],
                    [' Tessellated Mesh ', 'black']])
plotter.show()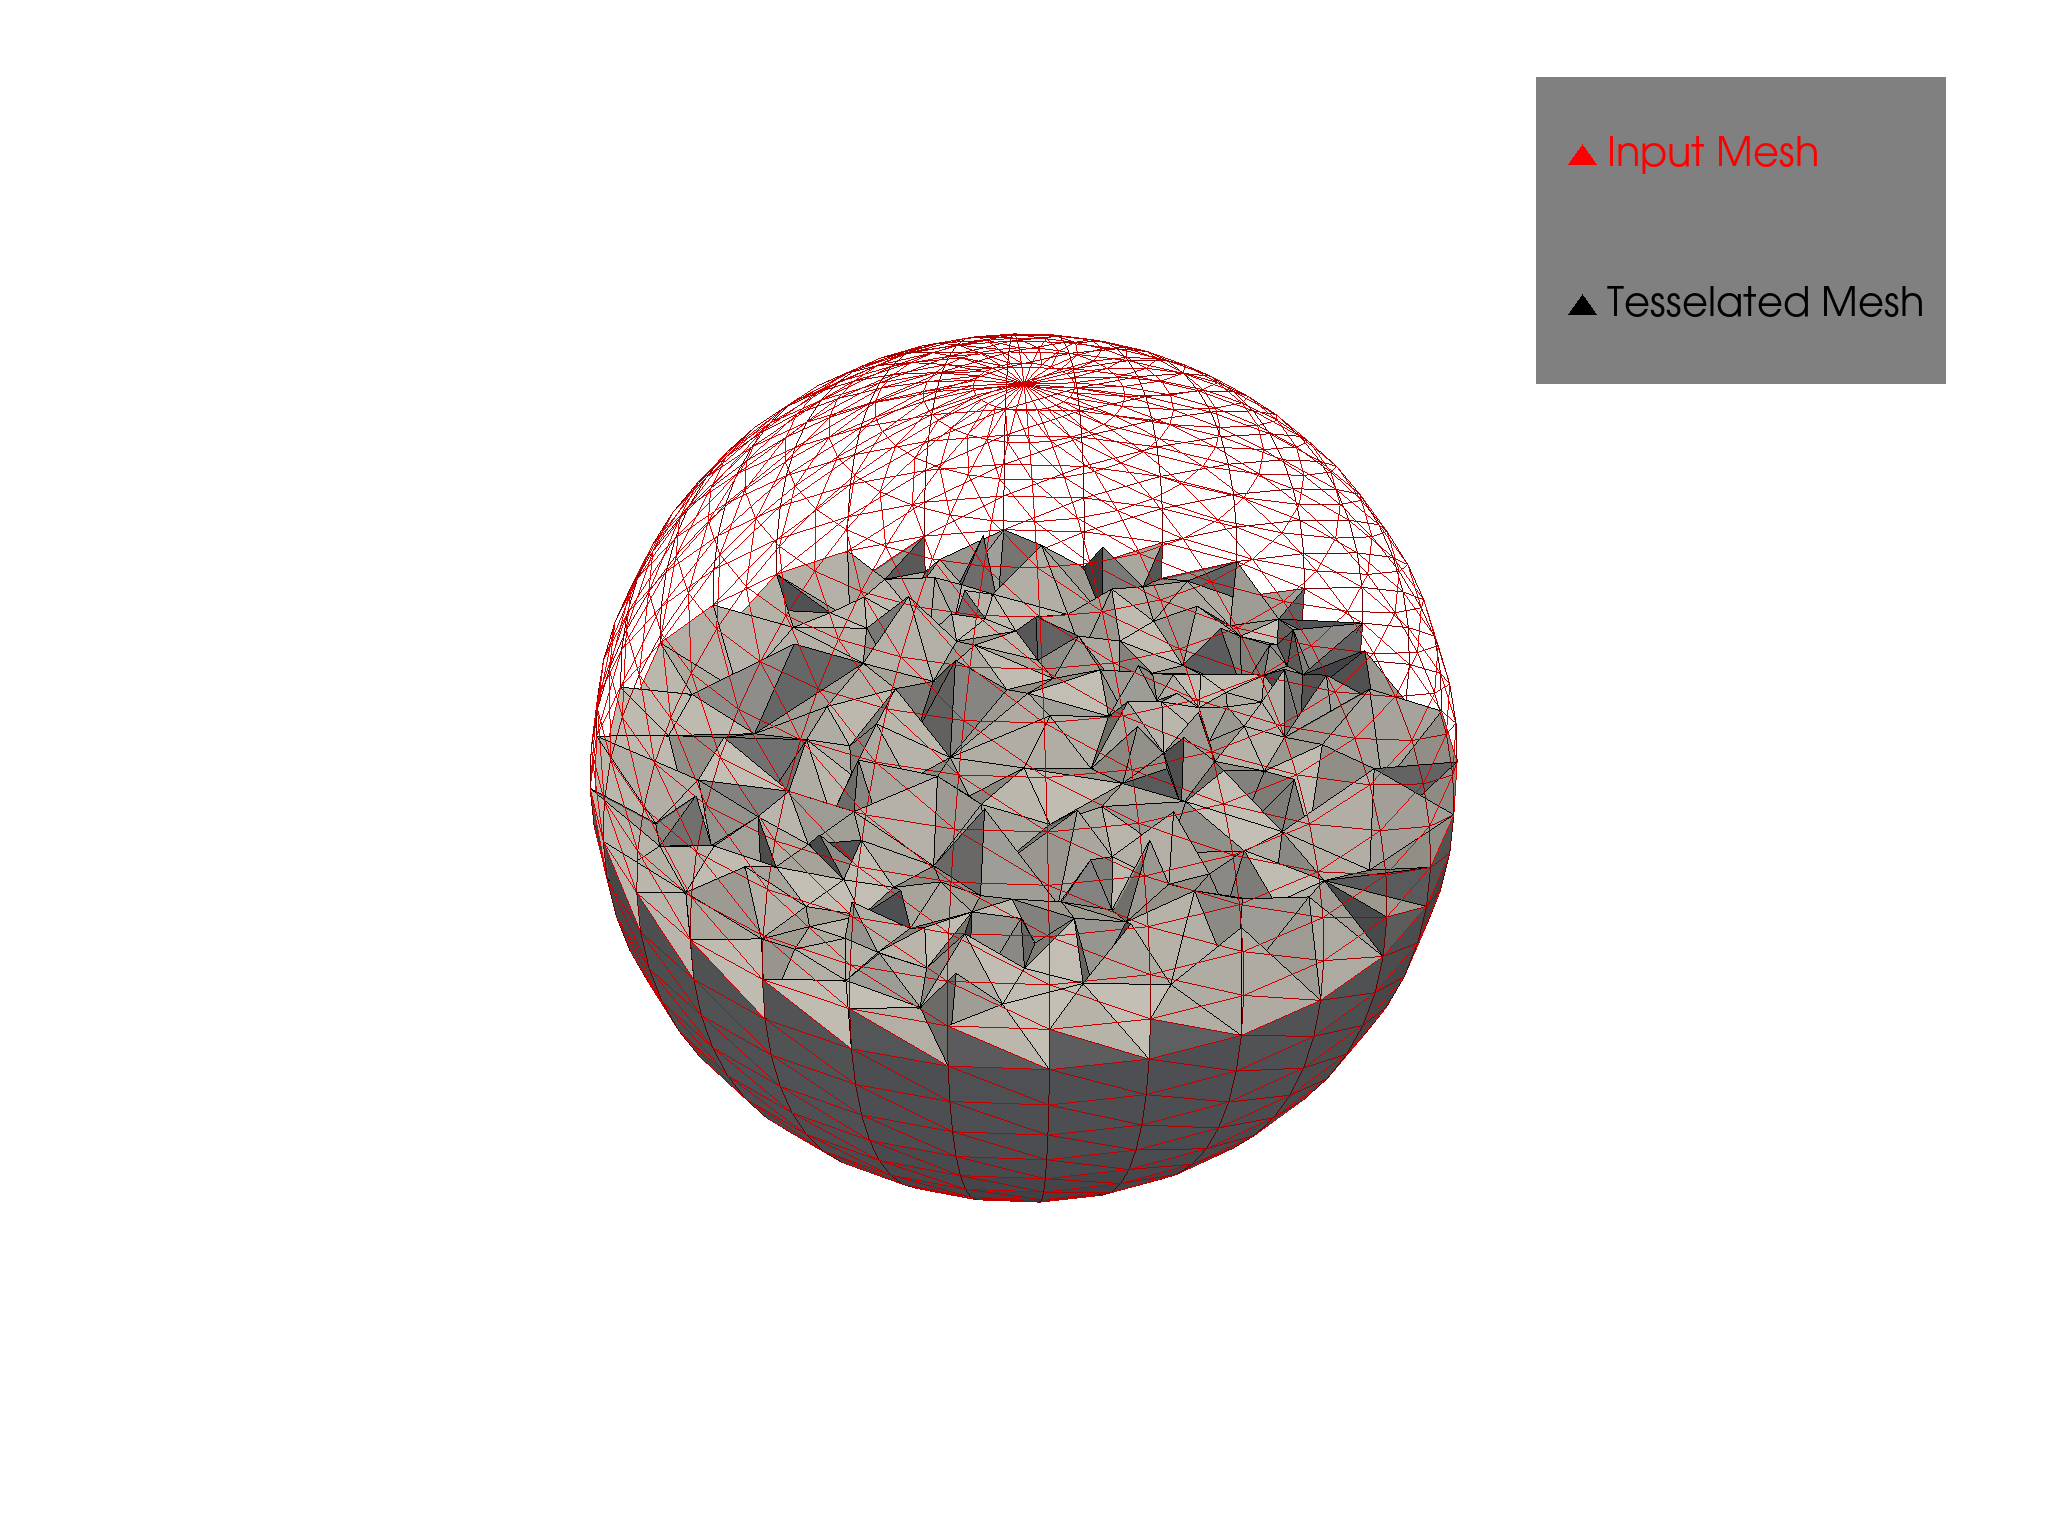
以下是根据最小缩放雅可比计算的单元质量。
Compute cell quality

>>> cell_qual = subgrid.compute_cell_quality()['CellQuality']

Plot quality

>>> subgrid.plot(scalars=cell_qual, stitle='Quality', cmap='bwr', clim=[0, 1],
...              flip_scalars=True, show_edges=True)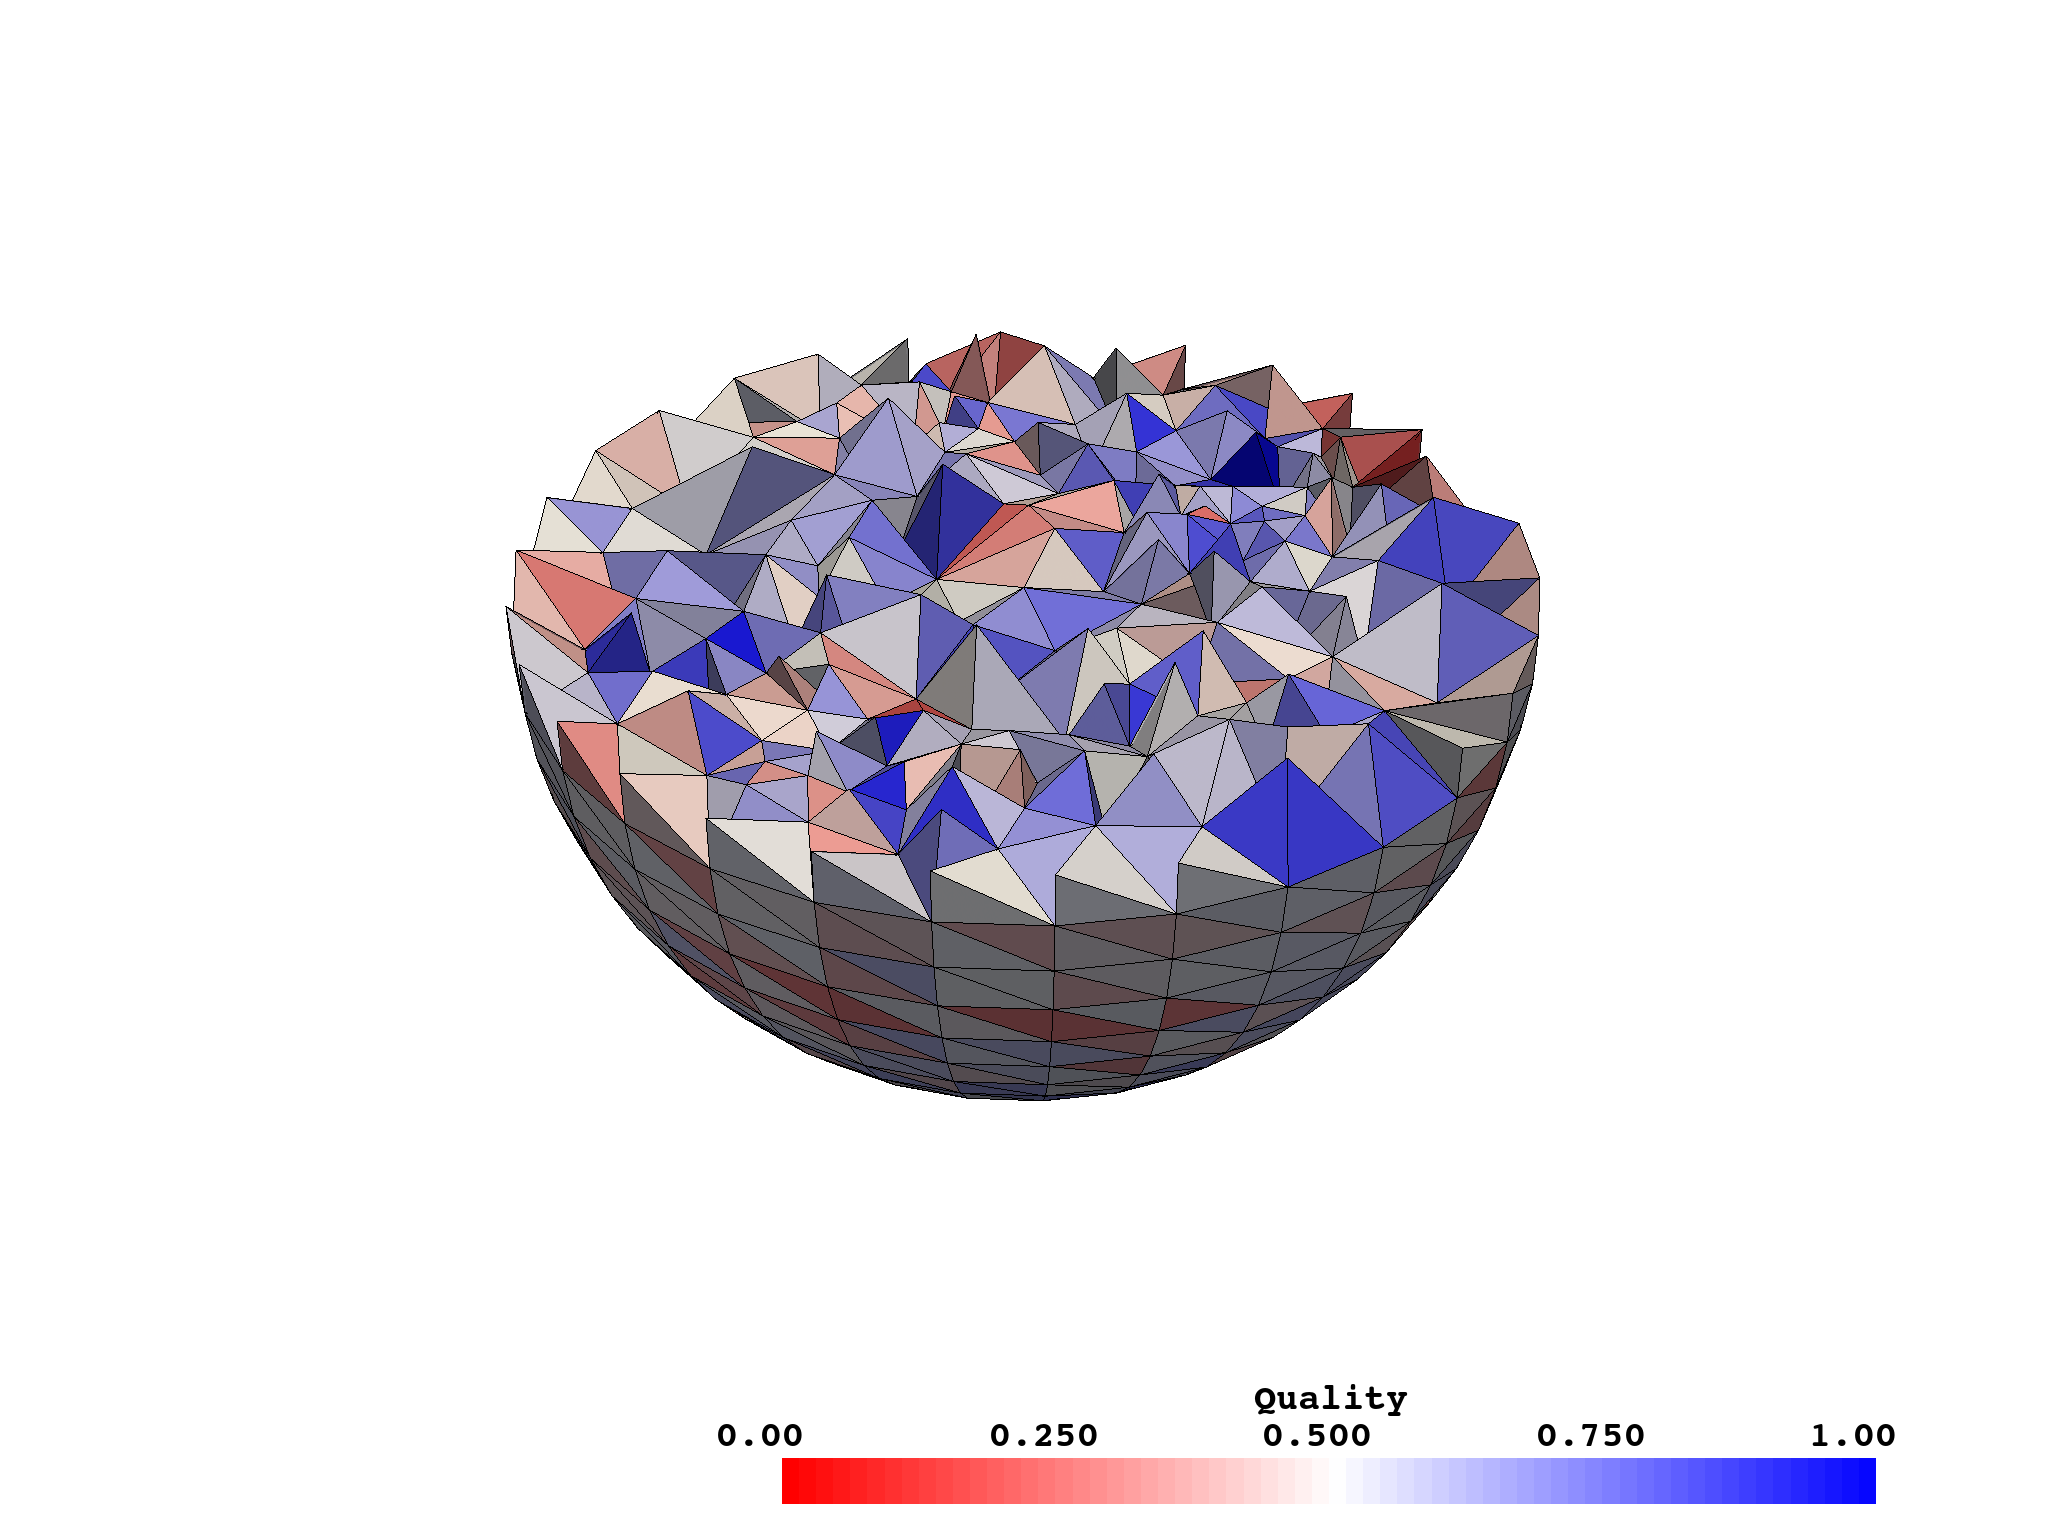
使用背景网格
TetGen中的背景网格用于定义自适应网格细化中的网格尺寸函数。此函数通知TetGen在整个域中期望的单元大小,允许在不必要的整个网格密集化的情况下,在特定区域进行详细细化。以下是如何在您的TetGen工作流程中利用背景网格的方法
生成背景网格:创建一个覆盖您输入的分段线性复杂(PLC)域全部范围的四面体网格。此网格将作为您尺寸函数的基础。
定义尺寸函数:在背景网格的节点上,定义所需的网格尺寸。这可以基于几何特征、接近感兴趣区域,或任何与您的模拟需求相关的标准。
可选:导出背景网格和尺寸函数:将您的背景网格保存为TetGen可读的.node和.ele格式,并将尺寸函数值保存到.mtr文件中。这些文件将被TetGen用于指导网格生成过程。
使用背景网格运行TetGen:调用TetGen,指定背景网格。TetGen将根据提供的尺寸函数调整网格,在需要较小单元的地方进行细化。
完整示例
为了说明,假设您想要在特定区域进行细化以提高细节。以下步骤和代码片段演示了如何使用TetGen和PyVista实现这一点
准备您的PLC和背景网格:
import pyvista as pv import tetgen import numpy as np # Load or create your PLC sphere = pv.Sphere(theta_resolution=10, phi_resolution=10) # Generate a background mesh with desired resolution def generate_background_mesh(bounds, resolution=20, eps=1e-6): x_min, x_max, y_min, y_max, z_min, z_max = bounds grid_x, grid_y, grid_z = np.meshgrid( np.linspace(xmin - eps, xmax + eps, resolution), np.linspace(ymin - eps, ymax + eps, resolution), np.linspace(zmin - eps, zmax + eps, resolution), indexing="ij", ) return pv.StructuredGrid(grid_x, grid_y, grid_z).triangulate() bg_mesh = generate_background_mesh(sphere.bounds)定义尺寸函数并将其写入磁盘:
# Define sizing function based on proximity to a point of interest def sizing_function(points, focus_point=np.array([0, 0, 0]), max_size=1.0, min_size=0.1): distances = np.linalg.norm(points - focus_point, axis=1) return np.clip(max_size - distances, min_size, max_size) bg_mesh.point_data['target_size'] = sizing_function(bg_mesh.points) # Optionally write out the background mesh def write_background_mesh(background_mesh, out_stem): """Write a background mesh to a file. This writes the mesh in tetgen format (X.b.node, X.b.ele) and a X.b.mtr file containing the target size for each node in the background mesh. """ mtr_content = [f"{background_mesh.n_points} 1"] target_size = background_mesh.point_data["target_size"] for i in range(background_mesh.n_points): mtr_content.append(f"{target_size[i]:.8f}") pv.save_meshio(f"{out_stem}.node", background_mesh) mtr_file = f"{out_stem}.mtr" with open(mtr_file, "w") as f: f.write("\n".join(mtr_content)) write_background_mesh(bg_mesh, 'bgmesh.b')使用背景网格运行TetGen:
直接从PyVista传递背景网格到tetgen
tet_kwargs = dict(order=1, mindihedral=20, minratio=1.5)
tet = tetgen.TetGen(mesh)
tet.tetrahedralize(bgmesh=bgmesh, **tet_kwargs)
refined_mesh = tet.grid
或者,使用背景网格文件。
tet = tetgen.TetGen(sphere)
tet.tetrahedralize(bgmeshfilename='bgmesh.b', **tet_kwargs)
refined_mesh = tet.grid
此示例演示了生成背景网格、定义空间变化的尺寸函数以及使用此背景网格引导TetGen细化PLC。通过遵循这些步骤,您可以实现符合您特定模拟要求的自适应网格细化。
致谢
该软件最初由Hang Si基于在基于Delaunay的质量四面体网格生成器TetGen中发表的工作创建。


下载文件
下载适用于您平台的文件。如果您不确定选择哪个,请了解有关安装包的更多信息。
源分发
构建分发
tetgen-0.6.5.tar.gz 的哈希值
| 算法 | 哈希摘要 | |
|---|---|---|
| SHA256 | 56855ccdbca98624c7f3db27ea020d3c7ea51baaa43b1c212b6a79b4ef4a9f35 |
|
| MD5 | 89b664ada960668607ef85fd07e3eb01 |
|
| BLAKE2b-256 | 2a447b2c2467cc56f59a1e5a7de1f4b8a7c7d6a7a3fcf769cd334badcb8a99de |
tetgen-0.6.5-cp312-cp312-win_amd64.whl 的哈希值
| 算法 | 哈希摘要 | |
|---|---|---|
| SHA256 | d50ff029172ca94c20e9b0e8f6cd604b4f8f9156834205f404a2e9ec3747c0d1 |
|
| MD5 | d3dc70ed2b7bf11b5ee09d1a72cdeedf |
|
| BLAKE2b-256 | 592ef1acd57edb0e857c567ab1b618234e9de64354fc60dfd1996fc8ea61e14f |
tetgen-0.6.5-cp312-cp312-manylinux_2_17_x86_64.manylinux2014_x86_64.whl 的哈希值
| 算法 | 哈希摘要 | |
|---|---|---|
| SHA256 | e224e35953ca2ca8fc5e95c038d81a4ac73aa9eb726130ab3c66fda721865c1c |
|
| MD5 | bf56af16834bed8d6e01c1f7bf06295c |
|
| BLAKE2b-256 | b28bcf4ce3ba629388cfd41a5d5f335946c1f99c061e9ab578afee81a0bca3a0 |
tetgen-0.6.5-cp312-cp312-macosx_11_0_arm64.whl 的哈希值
| 算法 | 哈希摘要 | |
|---|---|---|
| SHA256 | 712dce7fb72f9e395c301fce7fca136eec9ffbd3c31e5dac85e6a8bd2e36d2bd |
|
| MD5 | 2e8aa0bed80bb710e082299297f5b0a8 |
|
| BLAKE2b-256 | 145e2edafb4024900a47cfa3a5880d2c0363f0000e9f08c4033756a80ff55d98 |
哈希值 用于 tetgen-0.6.5-cp312-cp312-macosx_10_9_x86_64.whl
| 算法 | 哈希摘要 | |
|---|---|---|
| SHA256 | 938f851e5ff5e092404600493e92bb8a3f4102b8dbfa033cebfb18566f70957d |
|
| MD5 | a9168dc8cb24e8e7d55df318d430be3f |
|
| BLAKE2b-256 | 07f2a8c6ebb18a0b6bfa7cc157e9410ef5cc943f7ad1c3bcf5fe00c8951f74ce |
哈希值 用于 tetgen-0.6.5-cp311-cp311-manylinux_2_17_x86_64.manylinux2014_x86_64.whl
| 算法 | 哈希摘要 | |
|---|---|---|
| SHA256 | 4287f8af1bd82bd1e2e3d6517b0c54fd01b7e0d82889884e72d3b04223232066 |
|
| MD5 | 0aa2c57e5f9f5b68b3b8078fdbd51820 |
|
| BLAKE2b-256 | 6f7833cc40456a5b8e657e15cac5bbb68902bc7b8ee8be6927a43640a01f6b30 |
哈希值 用于 tetgen-0.6.5-cp311-cp311-macosx_11_0_arm64.whl
| 算法 | 哈希摘要 | |
|---|---|---|
| SHA256 | b330b350da447a39b11a171f9f215a1a634ac825fe07c75b4959a41667a63a37 |
|
| MD5 | e52edba88dd40903323ab6b95f3d6d47 |
|
| BLAKE2b-256 | 70081d880d9c0ce18052c4878f55758c428caa3346eb0d044bdb55984e840f9c |
哈希值 用于 tetgen-0.6.5-cp311-cp311-macosx_10_9_x86_64.whl
| 算法 | 哈希摘要 | |
|---|---|---|
| SHA256 | ad53c93741618456f980b6203272a6869d8d66631aa52063f6ba8c328d183ffb |
|
| MD5 | 73392e80006a2d753bcaac27ad752128 |
|
| BLAKE2b-256 | 3a6657dd5b3e9bdcadbfbaa21b78c71c84768c522ab3c53b0b4a95c028befe3d |
哈希值 用于 tetgen-0.6.5-cp310-cp310-manylinux_2_17_x86_64.manylinux2014_x86_64.whl
| 算法 | 哈希摘要 | |
|---|---|---|
| SHA256 | e8c16c70c7453e900dd88efa5cd528ce3aae2c83cda8ad02a0eadad7fc64532d |
|
| MD5 | 3fc5715056c0c13a6e404c0236dee2f8 |
|
| BLAKE2b-256 | 241367b1634127adcc42394a45fc430fcb331f0cebe70b1f93efd6e37fd04e12 |
哈希值 用于 tetgen-0.6.5-cp310-cp310-macosx_11_0_arm64.whl
| 算法 | 哈希摘要 | |
|---|---|---|
| SHA256 | 054a6aaab142c62c73e9567498fc2facf8db274cdf71420e675d8133773b475c |
|
| MD5 | 5d5a811f82894a5f9fdcdd53f26ddc6d |
|
| BLAKE2b-256 | 75039ccf5fc1d8aeecbd172f32cd819939c2f044bc06579eb8d83b996d9ab0ff |
哈希值 用于 tetgen-0.6.5-cp310-cp310-macosx_10_9_x86_64.whl
| 算法 | 哈希摘要 | |
|---|---|---|
| SHA256 | b89cc99b81cad302a8df952d0fba5baa72893439cb471d61b441cc6a1342ddbf |
|
| MD5 | 66bb96a5af7feda93919b07df58aec71 |
|
| BLAKE2b-256 | 72f0926b12a25fcd6cd208b7934c4dd38ac630755b06de2986094a7f033e3109 |
哈希值 用于 tetgen-0.6.5-cp39-cp39-manylinux_2_17_x86_64.manylinux2014_x86_64.whl
| 算法 | 哈希摘要 | |
|---|---|---|
| SHA256 | 0cad541abbc6a20b8b36e161067ea236ce865c88264bb3f517bc4c2e22a4de17 |
|
| MD5 | 2b7854d745c47431f92d088339d7bd26 |
|
| BLAKE2b-256 | f573fc68a41ed0a5bbe32290f75f9fcaeb3f04b3b86b1f257b0657f06898b282 |
哈希值 用于 tetgen-0.6.5-cp39-cp39-macosx_10_9_x86_64.whl
| 算法 | 哈希摘要 | |
|---|---|---|
| SHA256 | d664a5f2e7d39b7e59fcfa62d68f6b357f1ccf2820ebd72b08ddbf3b92808f5a |
|
| MD5 | bcc6e29dd9d18b083156985a7687e25d |
|
| BLAKE2b-256 | 3e6d9740bc10a8fc985e11833ef9b952e8b90ccd3495815f7b211050a9352946 |


