用于解析和操作RPM spec文件的库。


项目描述
specfile
Python库,用于解析和操作RPM spec文件。主要关注修改现有的spec文件,任何更改都应产生最小的差异。
动机
最初,rebase-helper 提供了一个用于修改 spec 文件的 API,该 API 也被 packit 使用。本项目的目标是使接口更通用,更方便使用,不仅限于 packit,也适用于其他需要与 RPM spec 文件交互的 Python 项目。
本库中使用的术语
节
节是 spec 文件的一个节,它有一个以 % 字符开头的明确名称,后面可以可选地跟有参数。
为了方便,本库中省略了节名开头的 %。
存在一个内部称为 %package 的特殊节,通常也称为序言,它表示位于第一个命名节(通常是 %description)之前的内容。本节包含主要包元数据(标签)。子包的元数据定义在后续的 %package 节中,这些节不是匿名的,并且总是跟有指定子包名称的参数(例如 %package doc 或 %package -n completely-different-subpackage-name)。
标签
标签代表包的元数据的一个单独项。它有一个明确的名称和值。标签定义在 %package 节中。
对于本库的目的,标签可以关联注释。这些是直接位于 spec 文件中标签定义之上的连续注释行。
源
源是一个源文件或由 Source/Patch 标签或由 %sourcelist/%patchlist 节中的条目定义的下流补丁。
源可以是本地源,由文件名指定,也可以是远程源,由 URL 指定。本地源应位于称为 sourcedir 的目录中。远程源应下载到该目录。
由标签定义的源可以明确编号,例如 Source0 或 Patch999,否则会进行隐式编号,源编号按顺序自动分配。
Prep 宏
Prep 宏是在 %prep 节中经常出现(并且只在其中出现,在其他地方没有意义)的宏。
本库识别了 4 个这样的宏,分别是 %setup、%patch、%autosetup 和 %autopatch。一个典型的 spec 文件使用 %autosetup 或 %setup 和 %patch 或 %autopatch 的组合。
文档
示例和使用场景
以下示例应涵盖 packit 需要的使用场景。
实例化
from specfile import Specfile

# using an absolute path
specfile = Specfile('/tmp/test.spec')

# using a relative path and a different sourcedir
specfile = Specfile('test.spec', sourcedir='/tmp/sources')
重新加载
# if the spec file happens to be modified externally, it can be reloaded
specfile.reload()
保存更改
# no autosave
specfile = Specfile('test.spec')
...
# saving explicitly when needed
specfile.save()

# enabling autosave, changes are saved immediately after any modification
specfile = Specfile('test.spec', autosave=True)

# as a context manager, saving is performed at context exit
with Specfile('test.spec') as specfile:
    ...
定义和取消定义宏
# override macros loaded from system macro files
specfile = Specfile('test.spec', macros=[('fedora', '38'), ('dist', '.fc38')])

# undefine a system macro (in case it's defined)
specfile = Specfile('test.spec', macros=[('rhel', None)])
低级操作
with specfile.sections() as sections:
    # replacing the content of a section
    sections.prep = ['%autosetup -p1']
    # removing a section
    del sections.changelog
    # swapping two sections
    sections[1], sections[2] = sections[2], sections[1]
    # accessing a section with arguments
    print(sections.get('package devel'))
    # inserting a line into a section
    sections.build.insert(0, 'export VERBOSE=1')

# copying a section from one specfile to another
with specfile1.sections() as sections1, with specfile2.sections() as sections2:
    sections2.changelog[:] = sections1.changelog
中级操作 - 标签、变更日志和 prep
# accessing tags in preamble
with specfile.tags() as tags:
    # name of the first tag
    print(tags[0].name)
    # raw value of the first tag
    print(tags[0].value)
    # expanded value of the first tag
    print(tags[0].expanded_value)
    # comments associated with the first tag
    print(tags[0].comments)
    # value of a tag by name
    print(tags.url)
    tags.url = 'https://example.com'

# accessing tags in subpackages
with specfile.tags('package devel') as tags:
    print(tags.requires)

# working with changelog
with specfile.changelog() as changelog:
    # most recent changelog entry
    print(changelog[-1])
    # making changes
    changelog[1].content.append('- another line')
    # removing the oldest entry
    del changelog[0]

# working with macros in %prep section, supports %setup, %patch, %autosetup and %autopatch
from specfile.prep import AutosetupMacro

with specfile.prep() as prep:
    # name of the first macro
    print(prep.macros[0].name)
    # checking if %autosetup is being used
    print('%autosetup' in prep)
    print(AutosetupMacro in prep)
    # changing macro options
    prep.autosetup.options.n = '%{srcname}-%{version}'
    # adding a new %patch macro
    prep.add_patch_macro(28, p=1, b='.test')
    # removing an existing %patch macro by name
    del prep.patch0
    # this works for both '%patch0' and '%patch -P0'
    prep.remove_patch_macro(0)
高级操作
版本和发布
# getting version and release
print(specfile.version)
print(specfile.release)

# setting version and release
specfile.version = '2.1'
specfile.release = '3'

# setting both at the same time (release defaults to 1)
specfile.set_version_and_release('2.1', release='3')

# setting version while trying to preserve macros
specfile.set_version_and_release('2.1', preserve_macros=True)
增加发布版本
要增加发布版本并添加新的变更日志条目,可以使用以下代码
from specfile import Specfile

with Specfile("example.spec") as spec:
    spec.release = str(int(spec.expanded_release) + 1)
    spec.add_changelog_entry("- Bumped release for test purposes")
变更日志
# adding a new entry, author is automatically determined
# (using the same heuristics that rpmdev-packager uses) if possible
# this function already honors autochangelog
specfile.add_changelog_entry('- New upstream release 2.1')

# adding a new entry, specifying author and timestamp explicitly
specfile.add_changelog_entry(
    '- New upstream release 2.1',
    author='Nikola Forró',
    email='nforro@redhat.com',
    timestamp=datetime.date(2021, 11, 20),
)

if specfile.has_autochangelog:
    # do something
源和补丁
with specfile.sources() as sources:
    # expanded location of the first source
    print(sources[0].expanded_location)
    # adding a source
    sources.append('tests.tar.gz')

with specfile.patches() as patches:
    # modifying location of the first patch
    patches[0].location = 'downstream.patch'
    # removing comments associated with the last patch
    patches[-1].comments.clear()
    # adding and removing patches
    patches.append('another.patch')
    del patches[2]
    # inserting a patch with a specific number
    patches.insert_numbered(999, 'final.patch')

# adding a single patch
specfile.add_patch('necessary.patch', comment='a human-friendly comment to the patch')
其他属性
print(specfile.name)
print(specfile.license)
print(specfile.summary)
specfile.url = 'https://example.com'
注意,如果您想访问多个标签值,使用 tags 上下文管理器可能会更快。
# same as above, but roughly 4x times faster (parsing/saving happens only once)
with specfile.tags() as tags:
    print(tags.name.value)
    print(tags.license.value)
    print(tags.summary.value)
    tags.url.value = 'https://example.com'
只读访问
如果您不需要写入访问,您可以使用上下文管理器的 content 属性,避免使用 with 语句。
# no changes done to the tags object will be saved
tags = specfile.tags().content

print(tags.version.expanded_value)
print(tags.release.expanded_value)

# number of sources
print(len(specfile.sources().content))
有效性
宏定义、标签、%sourcelist/%patchlist 条目以及源/补丁都有一个 valid 属性。如果一个实体不在任何条件假分支中,则认为它是有效的。
在规范文件中考虑以下内容
%if 0%{?fedora} >= 36
Recommends: %{name}-selinux
%endif
如果没有其他 Recommends 标签,则以下代码将根据 %fedora 宏的值打印 True 或 False
with specfile.tags() as tags:
    print(tags.recommends.valid)
您可以使用构造函数的 macros 参数或通过修改 Specfile 实例的 macros 属性来定义宏或重新定义/取消定义系统宏。
相同的规则也适用于 %ifarch/%ifos 语句
%ifarch %{java_arches}
BuildRequires: java-devel
%endif
如果没有其他 BuildRequires 标签,则如果当前平台是 %java_arches 的一部分,则以下代码将打印 True
with specfile.tags() as tags:
    print(tags.buildrequires.valid)
要覆盖此行为,您需要重新定义系统宏 %_target_cpu(或者 %_target_os,如果是 %ifos 的情况)。
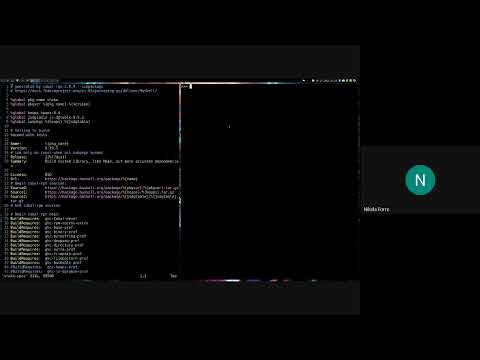
视频
以下是一个演示 Specfile.update_tag() 方法及其用例的示例


下载文件
下载适用于您的平台的文件。如果您不确定选择哪个,请了解更多关于 安装包 的信息。
源分发
构建分发
specfile-0.32.3.tar.gz 的散列值
| 算法 | 散列摘要 | |
|---|---|---|
| SHA256 | 47d8965c8dff97f243511f3a8c9729071b83c77339f44301de3479bdbdfd6f5f |
|
| MD5 | a8508a90324b234edde502287f139fa7 |
|
| BLAKE2b-256 | c83c6c0182a231f0e2ab100a19fc294de78f322bfe95c94253259429d6f1b03f |
specfile-0.32.3-py3-none-any.whl 的散列值
| 算法 | 散列摘要 | |
|---|---|---|
| SHA256 | cd6c0688834b07255fdd85277b66aa36e778e99533251bf3b21719700da6c857 |
|
| MD5 | a75dfb73de80631eb43a4b3b9135e9b6 |
|
| BLAKE2b-256 | 0cdc1748bfdc698ee577fa70767cfc4da8ea2ec92af756e69f853b33c6f62f29 |


