sm64-random-assets模块

项目描述
生成非版权随机资源,以便sm64和sm64-port可用于教育目的。
此版本仅针对US版本进行了测试,并且仅在Linux上测试。
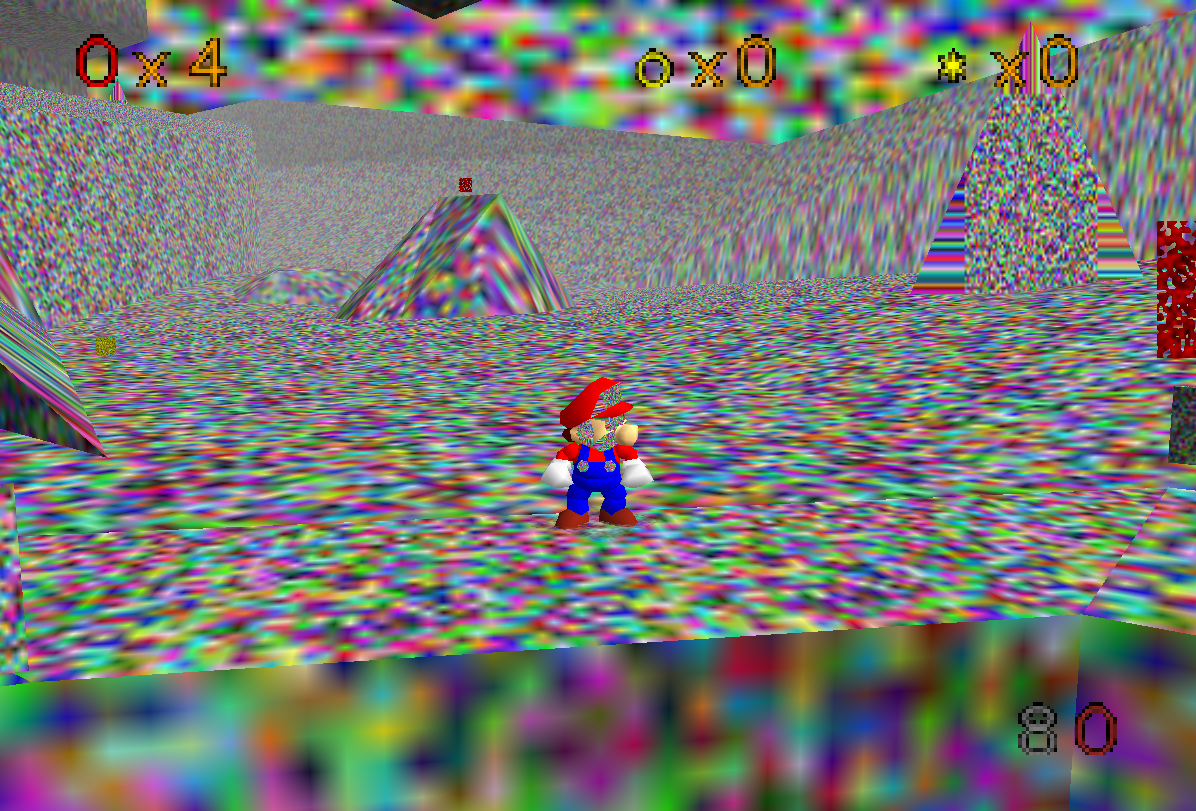
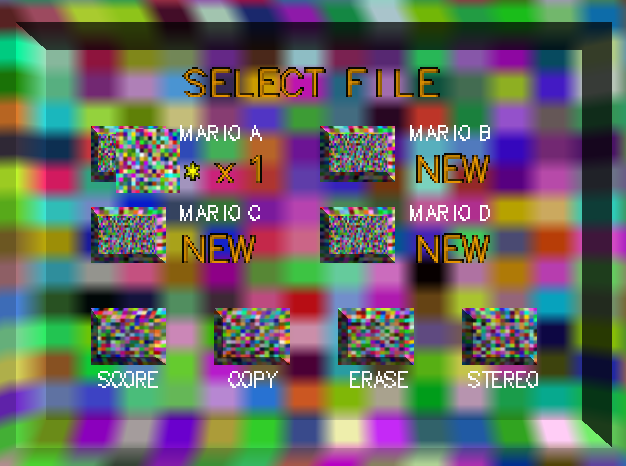
对于它生成的每个资源,它会生成一个随机纹理,除了在特殊情况下,例如文本,在这种情况下,可以使用开源工具生成合理的纹理。结果是令人惊讶的可玩。
未来的工作将支持资源的可配置和程序化生成。


Python需求
要运行资产生成脚本,需要以下需求。
pip install kwimage opencv-python-headless ubelt numpy ruamel.yaml PyYAML scriptconfig rich parsePC端口示例用法
以下说明是在Ubuntu 22.04 PC上编写的
# PC Port Dependencies
sudo apt install -y git build-essential pkg-config libusb-1.0-0-dev libsdl2-dev

# You can set your "code" directory path - the place where you will clone
# this repo - to be somewhere convenient for you
CODE_DPATH=$HOME/code

# Ensure your code directory exists
mkdir -p $CODE_DPATH

# Clone this repo
git clone https://github.com/Erotemic/sm64-random-assets.git $CODE_DPATH/sm64-random-assets

# Move into the root of this repo and initialize the sm64-port submodule,
# which will clone the official PC port repo.
cd $CODE_DPATH/sm64-random-assets
git submodule update --init tpl/sm64-port

# Run the asset generator
python $CODE_DPATH/sm64-random-assets/generate_assets.py --dst $CODE_DPATH/sm64-random-assets/tpl/sm64-port

# Move into the PC port directory
cd $CODE_DPATH/sm64-random-assets/tpl/sm64-port

# Compile
make NOEXTRACT=1 VERSION=us -j16
编译后的可执行文件现在可以直接运行
# Run the executable
build/us_pc/sm64.us
无头ROM用法
# ROM-only dependencies
sudo apt install -y binutils-mips-linux-gnu build-essential git libcapstone-dev pkgconf python3

# You can set your "code" directory path - the place where you will clone
# this repo - to be somewhere convenient for you
CODE_DPATH=$HOME/code

# Ensure your code directory exists
mkdir -p $CODE_DPATH

# Clone this repo
git clone https://github.com/Erotemic/sm64-random-assets.git $CODE_DPATH/sm64-random-assets

# Move into the root of this repo and initialize the sm64 submodule,
# which will clone the official ROM-only sm64 repo.
cd $CODE_DPATH/sm64-random-assets
git submodule update --init tpl/sm64

# Run the asset generator
python $CODE_DPATH/sm64-random-assets/generate_assets.py --dst $CODE_DPATH/sm64-random-assets/tpl/sm64

# Move into the ROM-only sm64 directory
cd $CODE_DPATH/sm64-random-assets/tpl/sm64

# Compile
NUM_CPUS=$(nproc --all)
NOEXTRACT=1 COMPARE=0 NON_MATCHING=0 VERSION=us make -j$NUM_CPUS

# The compiled ROM is: build/us/sm64.us.z64
现在可以将此ROM烧录到N64卡带、复制到Everdrive或使用N64模拟器(如Mupen64Plus)运行。例如,如果您已安装Mupen64Plus(例如 sudo apt install mupen64plus-qt),您可以运行
mupen64plus build/us/sm64.us.z64N64限制
在真实的N64硬件上,随机化所有纹理会导致系统锁定。这是因为N64有4兆内存,许多原始PNG纹理已优化以减少内存使用,方法是具有大块相同颜色的连续区域。天真地随机化每个像素不会生成适合PNG压缩的数据。
我已验证我可以进入每个主要阶段并完成每个波塞尔战斗,因此我认为通过减小纹理大小已经解决了所有崩溃。我用这个在真实的N64硬件上完成了一个16星运行。
开发
虽然我会尽量保证上述指令的正常运行和维护,但 build.sh 脚本是开发者从头到尾的入口点。从一个新的仓库开始,build.sh 脚本会负责整个流程,包括初始化子模块、生成资源、编译二进制文件,甚至使用 pc-port 在模拟器中运行,或者将 ROM 复制到 EverDrive。可以使用环境变量来控制 build.sh 的行为。
以下是一些常见示例
# Build and run the PC port
TEST_LOCALLY=1 TARGET=pc ./build.sh

# Build and run the ROM in an emulator (m64py)
TEST_LOCALLY=1 TARGET=rom EMULATOR=m64py ./build.sh
资源
Mupen64Plus 模拟器: https://wiki.debian.org/Mupen64Plus
为 Mupen64Plus 提供的 Python 前端: https://github.com/mupen64plus/mupen64plus-ui-python
Everdrive 64 X7: https://krikzz.com/our-products/cartridges/ed64x7.html
SM64 反编译器: https://github.com/n64decomp/sm64
SM64 反编译器 Discord: https://discord.gg/DuYH3Fh
Kaze Emanuar ROM 修改: https://www.notabug.org/anomie/kaze-emanuar-romhacks
SM64 随机化工具: https://github.com/andrelikesdogs/sm64-randomizer
SM64 修改和版本列表: https://en.wikipedia.org/wiki/List_of_Super_Mario_64_ROM_hacks,_mods_and_ports
SM64 plus: https://github.com/MorsGames/sm64plus
SM64 ex: https://github.com/sm64pc/sm64ex

下载文件
下载适用于您平台的文件。如果您不确定选择哪个,请了解更多关于 安装包 的信息。
源代码分布
构建分布
sm64_random_assets-0.0.1.tar.gz 的哈希值
| 算法 | 哈希摘要 | |
|---|---|---|
| SHA256 | 5a7ae8a725dfdd3867440524975b020d320eb98bba601a07c27cabf9c75b5374 |
|
| MD5 | b7a30119d69eb2d63fd18c0d7771db12 |
|
| BLAKE2b-256 | 999a9ad4733a675b530d16fe171a04fdfbcc634a67a399cbf73c7abf85c1a99b |
sm64_random_assets-0.0.1-py3-none-any.whl 的哈希值
| 算法 | 哈希摘要 | |
|---|---|---|
| SHA256 | 300049974279ceab917ba80a524e68ea50fae814ad8dc78c50d76e46aedd8c8f |
|
| MD5 | aee4237e4239dd84e420259b37053fac |
|
| BLAKE2b-256 | eef23c08006911659eb4b83eadfdc21c26a28e8e34c89266f3840a099b65afcc |


