一个小巧的免依赖日志类,简化日志记录

项目描述
Python日志助手


Python日志助手是一个小巧的类,旨在简化内置Python日志模块的使用。
它没有任何依赖,应与大多数Python 2.x和3.x版本兼容(尽管我们仍然建议最低为3.4)。
它最初由Chris (Someguy123)创建,用于个人Python项目,以及用于在Privex Inc.开发的项目。
如果这个项目对您有所帮助,请考虑从Privex获取VPS或专用服务器 - 价格从每月8美元起(我们接受加密货币!)
许可证
Python日志助手由伯利兹城Privex Inc.创建,并使用X11/MIT许可证授权。请参阅LICENSE文件中的许可证文本。
TL;DR; 许可证
我们不提供任何保证。您可以复制它、修改它,在具有不同许可证的项目中使用它,甚至在商业(付费)软件中使用。
最重要的规则是 - 您必须在任何副本中保留原始许可证文本可见(请参阅LICENSE)。
贡献
我们乐于接受任何大小的pull请求。
请确保您所做的任何更改都符合以下基本要求
- 没有额外依赖项。我们希望LogHelper轻量级且易于安装。
- 从其他项目取出的任何代码应与MIT许可证兼容
- 这是一个新项目,因此支持3.4版本之前的Python版本具有非常低的优先级。
- 然而,我们很高兴接受改进与旧版Python兼容性的PR,只要它不会
- 大大增加代码的复杂性
- 或者给使用较新版本Python的人带来问题。
安装
使用pip从PyPi下载并安装
Python 3
pip3 install privex-loghelper
Python 2
pip install privex-loghelper
(替代)从Git手动安装
选项1 - 使用pip直接从Github安装
pip3 install git+https://github.com/Privex/python-loghelper
选项2 - 克隆并手动安装
# Clone the repository from Github
git clone https://github.com/Privex/python-loghelper
cd python-loghelper

# RECOMMENDED INSTALL METHOD
# Use pip to install the source code
pip3 install .

# ALTERNATIVE INSTALL METHOD
# If you don't have pip, or have issues with installing using it, then you can use setuptools instead.
python3 setup.py install
用法
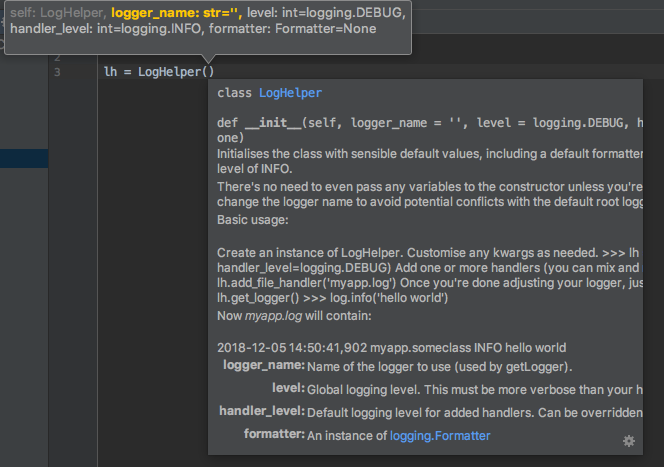
代码有很好的文档记录,你可以在LogHelper.py中找到所有用法文档。
所有函数都有类型注解,并带有详细的pydoc块注释。如果你使用的是像PyCharm这样的Python优化IDE,它应该会提供代码补全和使用包时的帮助。
基本用法
最基本的用法是使用不带参数的类初始化,并将文件处理器附加到文件以发送日志输出。
# Import the class
from privex.loghelper import LogHelper
# The first param is logger_name - a hierarchical dot-separated name to organise loggers.
# If it's not specified, or is None, it will use the root logger (which will affect some
# third-party packages that don't have their own logging settings)
lh = LogHelper('mylogger')
# Log to a file called test.log in the current directory
lh.add_file_handler('test.log')
# Grab the logger instance
log = lh.get_logger()
# Now let's log 'hello world' to the file.
log.info('hello world')
运行上面的代码后,test.log应包含
2018-12-05 22:05:18,915 root INFO hello world
将日志配置复制到其他日志名称
第三方包通常使用它们自己的日志实例名称。为了使你能够轻松地将设置复制到其他实例,你可以使用copy_logger(name)方法。
# Set up logging for your app, log anything >=INFO
lh = LogHelper('myapp', handler_level=logging.INFO)
# Log to a file called test.log in the current directory (note: absolute path is better)
lh.add_file_handler('test.log')
# Now copy your logging level, handlers, and formatting to the logger privex.jsonrpc
lh.copy_logger('privex.jsonrpc')
# You can specify multiple logger names as positional arguments. All specified loggers will
# have their handlers replaced with yours, and have their logging level set to match.
lh.copy_logger('example.app', 'otherexample')
在将设置复制到命名日志后,使用该日志的所有日志记录都应该使用你指定的处理器和日志级别。
这包括通过logging.getLogger('loggername')访问日志的模块,以及通过Python日志包装器如privex-loghelper。
将错误和调试日志分割到不同的文件中
将常规调试日志与警告和错误分开,可以更容易地筛选日志。
使用标准的logging模块,这需要10行代码,并且非常重复。
使用Python Log Helper,只需几行代码。
# Import the class
from privex.loghelper import LogHelper
# Import logging to be able to specify the verbosity levels
import logging

# The global level (kwarg `level`) defaults to DEBUG, but the default handler level is only INFO.
# You can specify handler_level to change that.
# To help prevent conflicts from other python packages which use the root ('') logger, you should set a custom
# logger name.
lh = LogHelper(logger_name='my_app', handler_level=logging.DEBUG)

# Log messages that are DEBUG (default handler and global logging level) or higher to `debug.log`
lh.add_file_handler('debug.log')

# Log only WARNING or above to `error.log`
lh.add_file_handler('error.log', level=logging.WARNING)

# Grab the logger instance
log = lh.get_logger()

# To test that logs are being sent to the correct files, let's try an `info`, a `warning` and an `error` log message.
log.info('something normal is happening')
log.warning('something strange is happening')
log.error('something VERY BAD is happening')
运行上面的Python脚本后,你应该看到以下日志文件
debug.log
2018-12-05 22:10:25,253 root         INFO        something normal is happening
2018-12-05 22:10:25,254 root         WARNING     something strange is happening
2018-12-05 22:10:25,256 root         ERROR       something VERY BAD is happening
error.log
2018-12-05 22:10:25,254 root         WARNING     something strange is happening
2018-12-05 22:10:25,256 root         ERROR       something VERY BAD is happening
如你所见,debug.log保存了所有消息,而error.log只保存了警告和错误。
日志轮转
你也可以轻松地实现日志轮转,而无需像logrotated这样的东西。
LogHelper类有一个名为add_timed_file_handler的函数,它包装了logging.handler.TimedRotatingFileHandler。
只需指定轮转的间隔类型(when),轮转的频率(interval),以及你希望在删除旧日志之前保留的间隔数(backups)。如果不想删除旧日志,将backups设置为0。
有关interval,when和backups的更多信息,请参阅官方日志文档
默认情况下,日志每天轮转一次(间隔=1),14天后删除(备份=14)。
# Import the class
from privex.loghelper import LogHelper
# Using sleep to simulate time passing
from time import sleep
lh = LogHelper()
# Log to a file called test.log in the current directory
# Rotate the log every minute, and only keep up to 60 minutes of logs
lh.add_timed_file_handler('test.log', when='M', interval=1, backups=60)
# Grab the logger instance
log = lh.get_logger()
# Now let's log 'hello world' to the file.
log.info('hello world')
log.info('hello world 2')
sleep(60)
log.info('hello world 3')
现在我们可以看到它生成了两个带时间戳的日志,因为间隔被设置为1分钟。
$ ls -l
    -rw-r--r--  1 user  users    58  5 Dec 22:58 test.log.2018-12-05_22-58
    -rw-r--r--  1 user  users    58  5 Dec 22:59 test.log.2018-12-05_22-59

$ cat test.log.2018-12-05_22-58
    2018-12-05 22:58:24,600 root         INFO     hello world
    2018-12-05 22:58:24,743 root         INFO     hello world 2

$ cat test.log.2018-12-05_22-59
    2018-12-05 22:59:25,512 root         INFO     hello world 3
并发日志轮转
对于像现代Django构建的应用程序这样的并发应用程序,你可能需要使用ConcurrentLogHandler才能正确地处理日志,如果你想使用它,你需要像这样安装带有并发额外信息的包
pip3 install 'privex-loghelper[concurrent]'
或者如果这不起作用,你可以手动安装ConcurrentLogHandler
pip3 install ConcurrentLogHandler
现在你可以将concurrent=True传递给add_timed_file_handler方法,以使用ConcurrentLogHandler而不是标准处理器
lh.add_timed_file_handler('test.log', when='M', interval=1, backups=60, concurrent=True)
感谢阅读!
如果这个项目对您有帮助,请考虑从Privex获取VPS或专用服务器 - 价格低至每月8美元(我们接受加密货币!)点击获取


下载文件
下载适合您平台的文件。如果您不确定选择哪个,请了解更多关于安装包的信息。