该模块使用参考图像在图像上执行结构保持颜色归一化。

项目描述
ITKColorNormalization


概述
此Insight Toolkit (ITK)模块使用参考图像对H & E图像执行结构保持颜色归一化。模块是用C++编写的,并为Python打包。
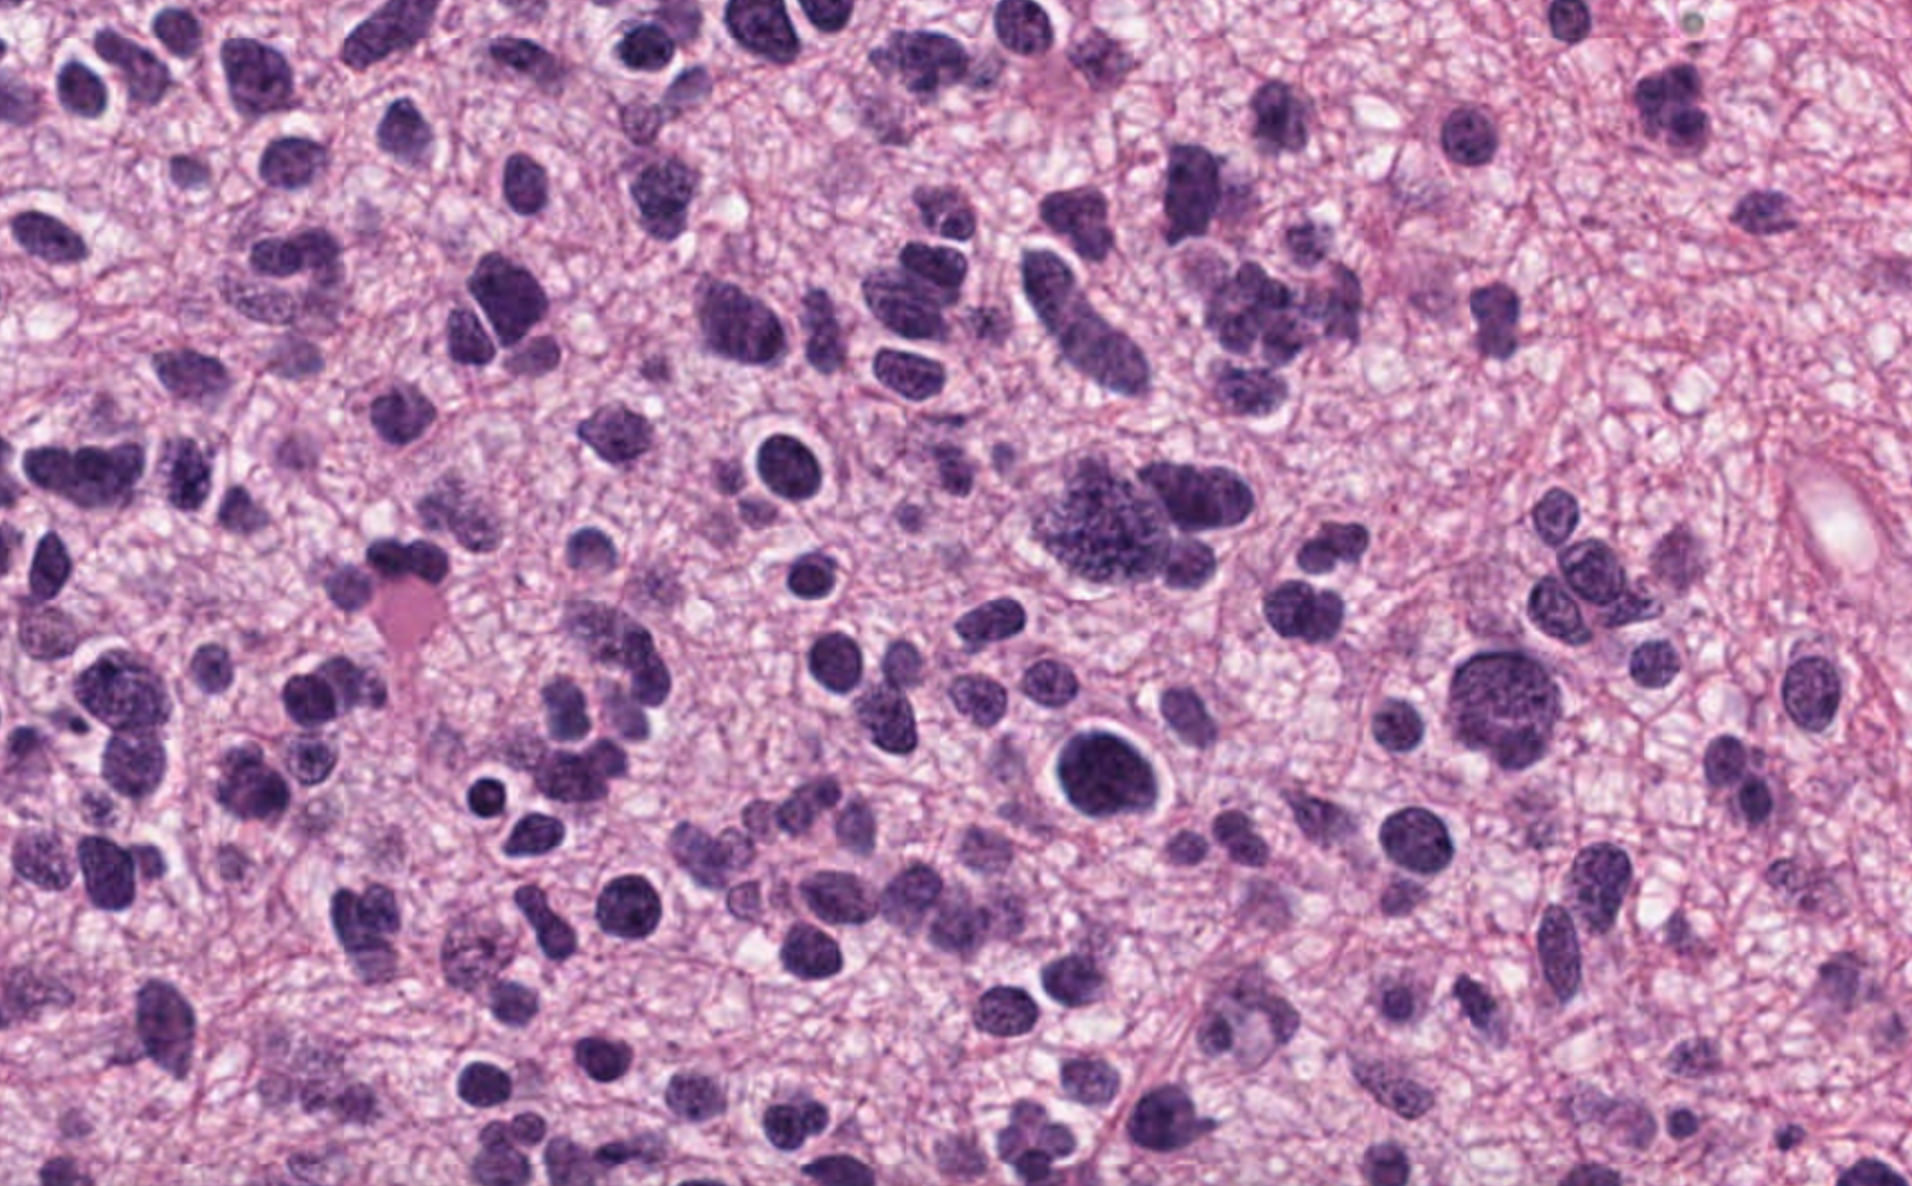
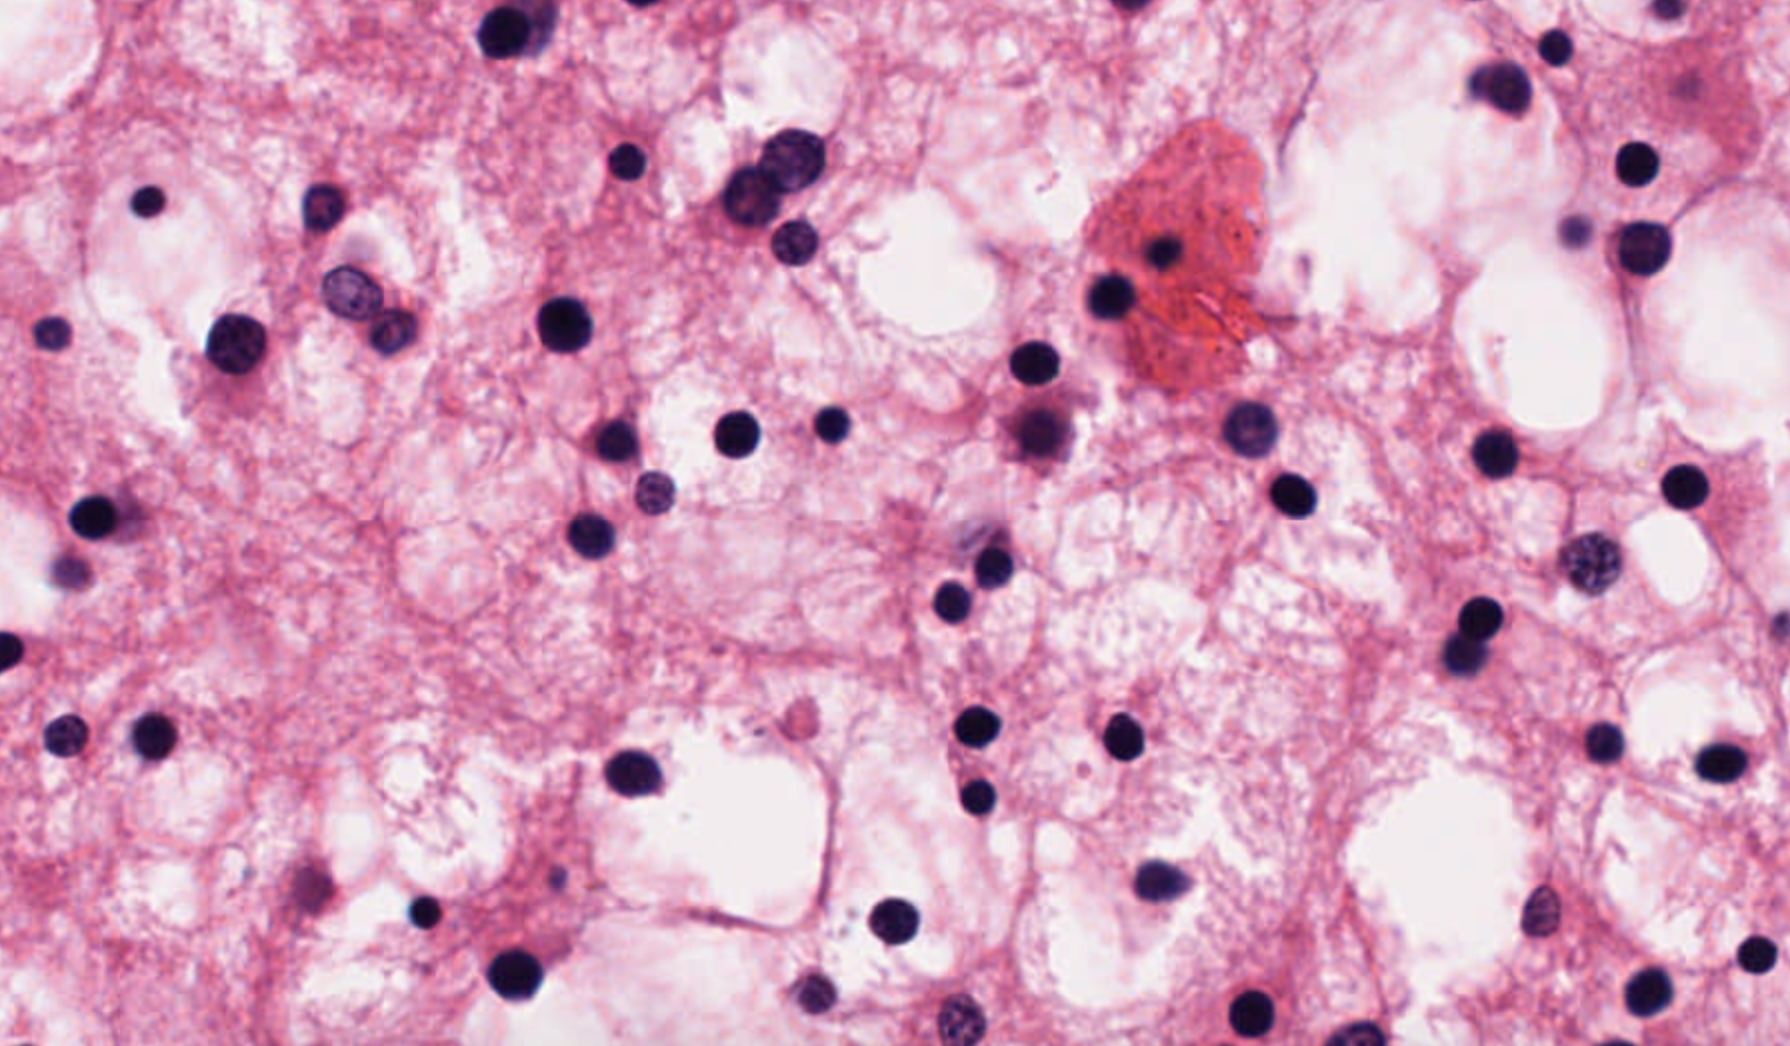
H & E (苏木精和伊红)是用于对组织学图像中细胞部分进行染色的染料,通常用于医学诊断。苏木精是一种使细胞核呈紫色-蓝色染料的化合物。伊红是一种使细胞外基质和细胞质呈粉红色的化合物。然而,紫色-蓝色或粉红色的确切颜色可能会因图像而异,这可能会使图像比较变得困难。此例程通过使用参考图像(例程中提供的第二个图像)的颜色方案重新着色一个图像(例程提供的第一个图像)来解决此问题。该技术要求图像至少有3种颜色,如红、绿和蓝(RGB)。
结构保持彩色归一化是一种在Vahadane等人于2016年的论文中描述的技术,并在Ramakrishnan等人于2019年的论文中进行修改。这种技术的想法是将图像像素的颜色建模为接近纯白色,通过依赖于血红素和伊红存在量的光学吸收模型以特定的方式减少其强度。非负矩阵分解被用于每个分析的图像,以同时推导出每个像素中血红素和伊红染料的量以及每个染料的图像全局有效颜色。
在ITK中的实现通过使用类似于Arora等人于2013年的论文中提出的技术并对其进行修改的Newberg等人于2018年的论文中的技术来选择颜色吸收特性的初始估计值,从而加速非负矩阵分解。这种方法首先将问题转换为在云中一组点的凸包寻找问题,从而找到非负矩阵分解的一个良好解。
InsightSoftwareConsortium/ITKColorNormalization的主要开发者是Lee Newberg。
在线尝试
我们使用Binder搭建了此技术的演示,任何人都可以尝试。点击这里:[图片链接]
Python安装

ITKColorNormalization及其所有依赖项可以轻松地通过Python wheel进行安装。已为macOS、Linux和Windows以及Python 3.6、3.7、3.8和3.9的几个版本生成了wheel。如果您不希望安装到当前的Python环境中,您应该首先创建并激活一个Python虚拟环境(venv)进行工作。然后,从命令行运行以下命令:
pip install itk-spcn
启动python,导入itk包,并设置输入图像的变量名
import itk

input_image_filename = "path/to/image_to_be_normalized"
reference_image_filename = "path/to/image_to_be_used_as_color_reference"
Python中的使用
以下示例使用参考图像的颜色方案转换输入图像
以产生输出图像
到ITK的功能接口

功能,急切接口
您可以使用ITK的功能、急切接口来选择何时执行每个步骤,如下所示。处理input_image和reference_image以产生normalized_image,这是具有reference_image颜色方案的input_image。如果input_image的像素类型是RGB或RGBA,则color_index_suppressed_by_hematoxylin和color_index_suppressed_by_eosin参数是可选的。在这里,您指出血红素抑制最强的颜色通道是0(对于RGB和RGBA像素来说是红色)以及伊红抑制最强的颜色通道是1(对于RGB和RGBA像素来说是绿色);这些是RGB和RGBA像素的默认值。
input_image = itk.imread(input_image_filename)
reference_image = itk.imread(reference_image_filename)

eager_normalized_image = itk.structure_preserving_color_normalization_filter(
    input_image,
    reference_image,
    color_index_suppressed_by_hematoxylin=0,
    color_index_suppressed_by_eosin=1,
)

itk.imwrite(eager_normalized_image, output_image_filename)
ITK管道接口
或者,您可以使用ITK管道基础设施,它在调用Update()或Write()之前等待执行管道。函数itk.StructurePreservingColorNormalizationFilter.New()使用其参数来确定过滤器的像素类型;实际图像在那里不使用,而是通过spcn_filter.SetInput(0, input_reader.GetOutput())调用提供。与上面一样,如果像素类型是RGB或RGBA,则调用SetColorIndexSuppressedByHematoxylin和SetColorIndexSuppressedByEosin是可选的。
input_reader = itk.ImageFileReader.New(FileName=input_image_filename)
reference_reader = itk.ImageFileReader.New(FileName=reference_image_filename)

spcn_filter = itk.StructurePreservingColorNormalizationFilter.New(
    Input=input_reader.GetOutput()
)
spcn_filter.SetColorIndexSuppressedByHematoxylin(0)
spcn_filter.SetColorIndexSuppressedByEosin(1)
spcn_filter.SetInput(0, input_reader.GetOutput())
spcn_filter.SetInput(1, reference_reader.GetOutput())

output_writer = itk.ImageFileWriter.New(spcn_filter.GetOutput())
output_writer.SetInput(spcn_filter.GetOutput())
output_writer.SetFileName(output_image_filename)
output_writer.Write()
请注意,如果在不同的 input_image 上再次使用 spcn_filter,例如来自不同的读取器,
spcn_filter.SetInput(0, input_reader2.GetOutput())
但 reference_image 未更改,则过滤器将使用其缓存的 reference_image 分析,这可以节省大约一半的处理时间。


下载文件
下载适合您平台的文件。如果您不确定该选择哪个,请了解有关安装包的更多信息。
源分发
构建分发
itk_spcn-0.2.0-cp311-cp311-win_amd64.whl 的哈希值
| 算法 | 哈希摘要 | |
|---|---|---|
| SHA256 | 1347a763ac2b1e99af081dd4dee9e765b0edcda00e106b41f784a76910eea4e5 |
|
| MD5 | 0e8e0361721bd2e1171c4282d0bf2aab |
|
| BLAKE2b-256 | e01160b98b90937700e40e908e256da2966d0b873930013f8fd66b0be321cf06 |
itk_spcn-0.2.0-cp311-cp311-manylinux_2_28_x86_64.whl 的哈希值
| 算法 | 哈希摘要 | |
|---|---|---|
| SHA256 | 9e61974759c5143a227a29f167d4038681d15d27d8e4652bdec0efcfcf1d5761 |
|
| MD5 | a610764c7c5bd42993c1fb201d6ec447 |
|
| BLAKE2b-256 | 92e30a46e8aff6651c28856fa776b25f3f4417a2254632efd7a50cf331b0a060 |
itk_spcn-0.2.0-cp311-cp311-manylinux_2_17_x86_64.manylinux2014_x86_64.whl 的哈希值
| 算法 | 哈希摘要 | |
|---|---|---|
| SHA256 | 6b85d395fd3e4a0281ce8c610f89fcd5a5781c08d5061c4f670eb44a5502e8f7 |
|
| MD5 | 81a21312d5070793bb1776e2a20440bb |
|
| BLAKE2b-256 | 6ccc63bcc3076b919f35e168a856c5e20522586cec47527633f8f2d560d1b6af |
itk_spcn-0.2.0-cp311-cp311-macosx_10_9_x86_64.whl 的哈希值
| 算法 | 哈希摘要 | |
|---|---|---|
| SHA256 | 88e4951533a7c3526375a02e72841df4dce91579665b4381f523fff8a95e4776 |
|
| MD5 | 50724b8900a06f461d29caa54509496d |
|
| BLAKE2b-256 | 8433a29d414e4bb299a686d271f9a7f5befce669a8425bd27a29d06c431dbf5d |
itk_spcn-0.2.0-cp310-cp310-win_amd64.whl 的哈希值
| 算法 | 哈希摘要 | |
|---|---|---|
| SHA256 | de2f51a4c89e029d4d807b4eb755d4846bec1e06ca9d627386113616c60b9613 |
|
| MD5 | c9e53b9c14f058f3fd2de06311ac3691 |
|
| BLAKE2b-256 | f6fc0bb7e49f1d5c3ad129bc482ebffa38a8d40e6fb7e13a94b9684b245740d8 |
itk_spcn-0.2.0-cp310-cp310-manylinux_2_28_x86_64.whl 的哈希值
| 算法 | 哈希摘要 | |
|---|---|---|
| SHA256 | 4a99d061a8577123a107266eaab416e543f8c9ecc8dc5c9e67131cb5c883ab14 |
|
| MD5 | ac69a9ce1f39f4c54c48108a3442b775 |
|
| BLAKE2b-256 | ac5f78c3a0c136ea19ae1ca7d395163b0771415589f5c20809986021e4d26c31 |
itk_spcn-0.2.0-cp310-cp310-manylinux_2_17_x86_64.manylinux2014_x86_64.whl 的哈希值
| 算法 | 哈希摘要 | |
|---|---|---|
| SHA256 | 443d700ef78fdecf4107f9da7ecd368ec2f62afd9d4442e6e097432dc6547b6a |
|
| MD5 | a33754688628df6d45edbf07b482aa1a |
|
| BLAKE2b-256 | d24fc86d20be3431edf7c79ed29cf32347e1407bec1e67a3b201e068636ab69e |
itk_spcn-0.2.0-cp310-cp310-macosx_10_9_x86_64.whl 的哈希值
| 算法 | 哈希摘要 | |
|---|---|---|
| SHA256 | 9fcfc4571b7e851965c47a95f74dc43f5de025b926cb6e360dc9e2feb86b0a05 |
|
| MD5 | 058f27b8743f2d57b378d43e43f783a7 |
|
| BLAKE2b-256 | e01b328890efe1fe8e6c95f7a6386ad75f696ddc006efd052b5a4af42ec28a7c |
itk_spcn-0.2.0-cp39-cp39-win_amd64.whl 的哈希值
| 算法 | 哈希摘要 | |
|---|---|---|
| SHA256 | 526895d0ef8c08ec4076344cec7927efba7915d2e079f8693754233af1bf4b98 |
|
| MD5 | 38f92ef8da580164503593b22bd876fa |
|
| BLAKE2b-256 | c0199111688b1acba06fbb6a85b9093352836011bfe46eb20ab764bddf4bb19b |
哈希值 for itk_spcn-0.2.0-cp39-cp39-manylinux_2_28_x86_64.whl
| 算法 | 哈希摘要 | |
|---|---|---|
| SHA256 | 18e3c99db96cd2e75b768bf10d37b2931d0dd21a565a999356297568efb7b971 |
|
| MD5 | 6e6e301a5ddccfff359aff083c1c01a3 |
|
| BLAKE2b-256 | 4a5cb15f5c83cf828e111c73ea18a2298ebbbfa496aa644d48aa055b0ae037d5 |
哈希值 for itk_spcn-0.2.0-cp39-cp39-manylinux_2_17_x86_64.manylinux2014_x86_64.whl
| 算法 | 哈希摘要 | |
|---|---|---|
| SHA256 | 6256608b443485e068036147f372533c688c884e58c35f397040138e15257c23 |
|
| MD5 | 03168042def6e40fa594d21d7adac050 |
|
| BLAKE2b-256 | 6f509b3b1a34b70e398a7fc69cec30c05225cd4ec4a859e31c5d952dfc70b105 |
哈希值 for itk_spcn-0.2.0-cp39-cp39-macosx_10_9_x86_64.whl
| 算法 | 哈希摘要 | |
|---|---|---|
| SHA256 | 8903f705e4703116c3ba27f14776fb053e75b245992fac9237879c3ae128fcc2 |
|
| MD5 | 07a04bef046b672a1c69dd96c1fa108e |
|
| BLAKE2b-256 | 1efc50be9fc56322203e8032d74241159eeaba984915b5dcfc982cd05717f6c2 |
哈希值 for itk_spcn-0.2.0-cp38-cp38-manylinux_2_28_x86_64.whl
| 算法 | 哈希摘要 | |
|---|---|---|
| SHA256 | 753ba5eba828c727ad81911fb5717b5eb3afd34163d64dabb671514c01e53bea |
|
| MD5 | 2d13cdfeabcf8574e5d203d711f40927 |
|
| BLAKE2b-256 | cccc97b20cc4da14ebb45fd0c7160b7102d7dee018352ac534744b37ac7e81e7 |
哈希值 for itk_spcn-0.2.0-cp38-cp38-manylinux_2_17_x86_64.manylinux2014_x86_64.whl
| 算法 | 哈希摘要 | |
|---|---|---|
| SHA256 | ef776077c2ce33027150d1ebc6be1860287ad585f49b28f1e4f81ee9c797d138 |
|
| MD5 | c1c1fa245585af3f52146c7a74b2da15 |
|
| BLAKE2b-256 | 3b64dc849ee874600046dec2fd95d8febdd3dfa303dd5d10190498d22155eebe |
哈希值 for itk_spcn-0.2.0-cp38-cp38-macosx_10_9_x86_64.whl
| 算法 | 哈希摘要 | |
|---|---|---|
| SHA256 | 1ee0631cd178906c963048c358c482e391ff39181f2f854f0ac072dc94ef9a4b |
|
| MD5 | 73171eb176e4011f499acaec0c0cdcdd |
|
| BLAKE2b-256 | 4c8306a93a412eaebb994d34ae4e5f88585587bc8575ee1f1d201ead6a7c137d |
哈希值 for itk_spcn-0.2.0-cp37-cp37m-manylinux_2_28_x86_64.whl
| 算法 | 哈希摘要 | |
|---|---|---|
| SHA256 | 52067887188f2f2e401bed018bc3a2749b1599c45c78be80de16109722574d66 |
|
| MD5 | 660ba9730ae616ab7a1afd5837bffd3d |
|
| BLAKE2b-256 | 2a08414066b7831de428a83c419cfcfd93b0cf05d6adc822b143dd5ab834f860 |
哈希值 for itk_spcn-0.2.0-cp37-cp37m-manylinux_2_17_x86_64.manylinux2014_x86_64.whl
| 算法 | 哈希摘要 | |
|---|---|---|
| SHA256 | 61eeea77ab96a2d86de680f8f1bf8d9ba8f111e75e1130c6214771b8eff7a2e3 |
|
| MD5 | 89502208015adcb5a2e845c08ea97473 |
|
| BLAKE2b-256 | f2d48572cd5802aa6887ef2a5c6b3bac6350bd53d125078eefef7953220ff427 |
哈希值 for itk_spcn-0.2.0-cp37-cp37m-macosx_10_9_x86_64.whl
| 算法 | 哈希摘要 | |
|---|---|---|
| SHA256 | 25e1ec4fbcacf26b9933a7d67e56a999615b1b63307376131794e2b3b1e1e5da |
|
| MD5 | 02185d8682230e166f959a3f65762c50 |
|
| BLAKE2b-256 | e059a020e3339e1ab7add3204287834881ad403055e84306a286f390078831f6 |


