在命令行中将GeoJSON渲染为ASCII。
项目描述
            _ ___                   _ _
   ____ _  (_)__ \ ____ ___________(_|_)
  / __ `/ / /__/ // __ `/ ___/ ___/ / /
 / /_/ / / // __// /_/ (__  ) /__/ / /
 \__, /_/ //____/\__,_/____/\___/_/_/
/____/___/

使用Python在命令行中将空间矢量数据渲染为ASCII或emoji。

为什么?
一条推文让这个练习看起来很有趣,但“gj2ascii”命令行实用程序已被证明在预览多个文件和调试复杂的地理处理操作时非常有用。
默认行为
此实用程序的整体目标是提供方便访问矢量几何和重叠层的ASCII表示。
在渲染单个层时,使用ASCII字符。
在渲染多个层时,使用颜色,并使用随机分配的字符和透明填充。
只有7种颜色(黑色不用于自动分配),所以如果提供了超过7层的层,则必须使用--char标志为每个层手动分配字符、emoji或颜色。
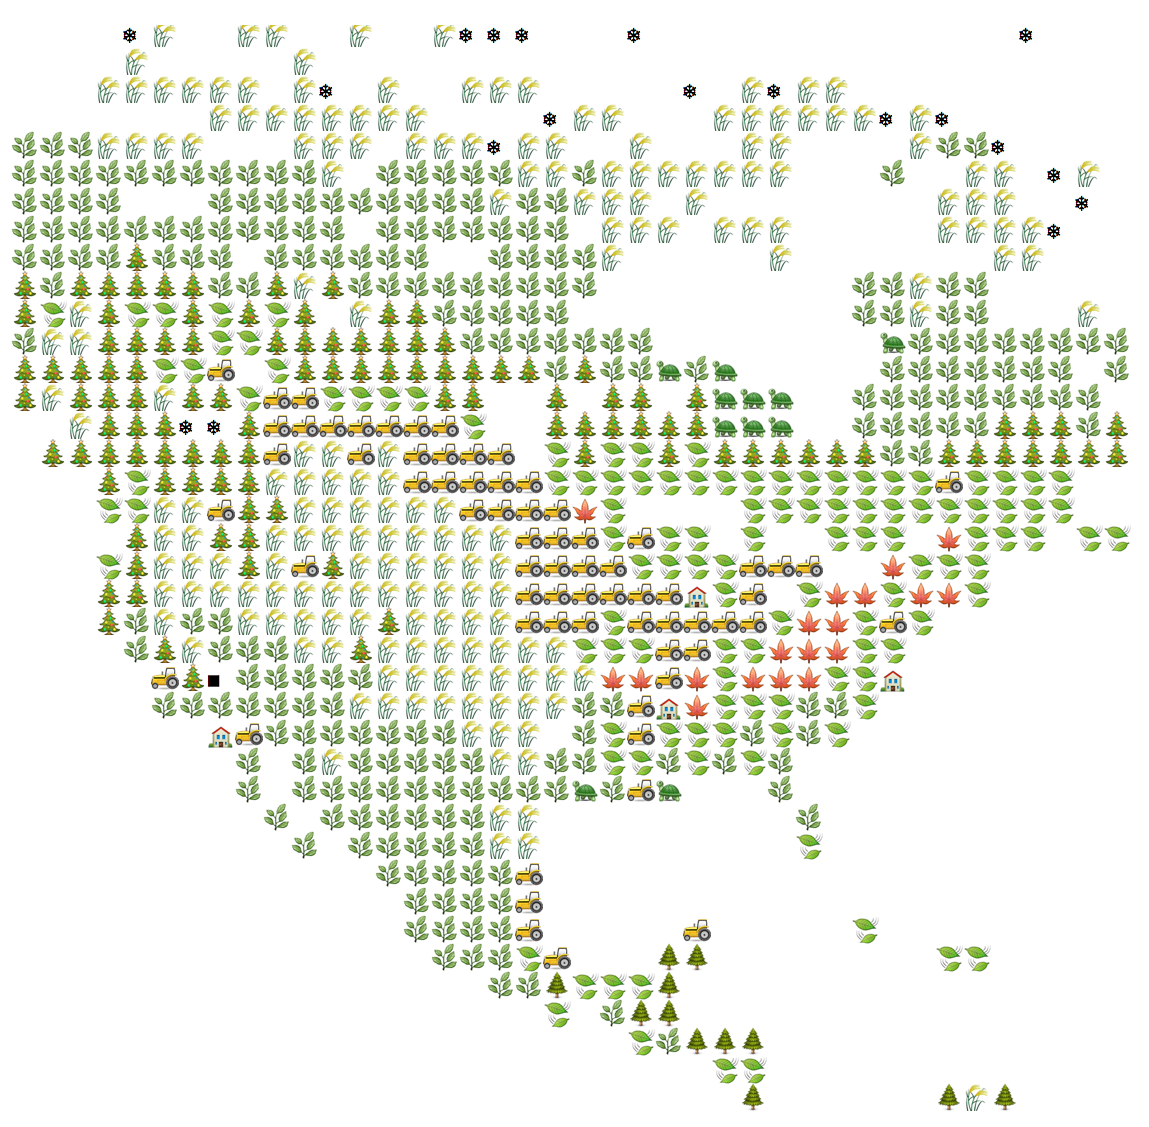
emoji示例
emoji屏幕截图是通过下载MODIS土地覆盖数据集的GeoTIFF版本,将其重新采样到其原始大小的25%,将大小转换为矢量数据,使用gdal_polygonize.py,然后用QGIS将其分割成每个类的一个ESRI Shapefile,最后执行以下命令生成的:
$ gj2ascii \
    --bbox -130 9 -61.5 77 \
    --width 80 \
    0.geojson -c ' ' \
    1.geojson -c :christmas_tree: \
    2.geojson -c :evergreen_tree: \
    3.geojson -c :maple_leaf: \
    4.geojson -c :maple_leaf: \
    5.geojson -c :deciduous_tree: \
    6.geojson -c :herb: \
    7.geojson -c :herb: \
    8.geojson -c :herb: \
    9.geojson -c :herb: \
    10.geojson -c :ear_of_rice: \
    11.geojson -c :turtle: \
    12.geojson -c :tractor: \
    13.geojson -c :house_building: \
    14.geojson -c :leaf_fluttering_in_wind: \
    15.geojson -c :snowflake: \
    16.geojson -c :black_medium_square:
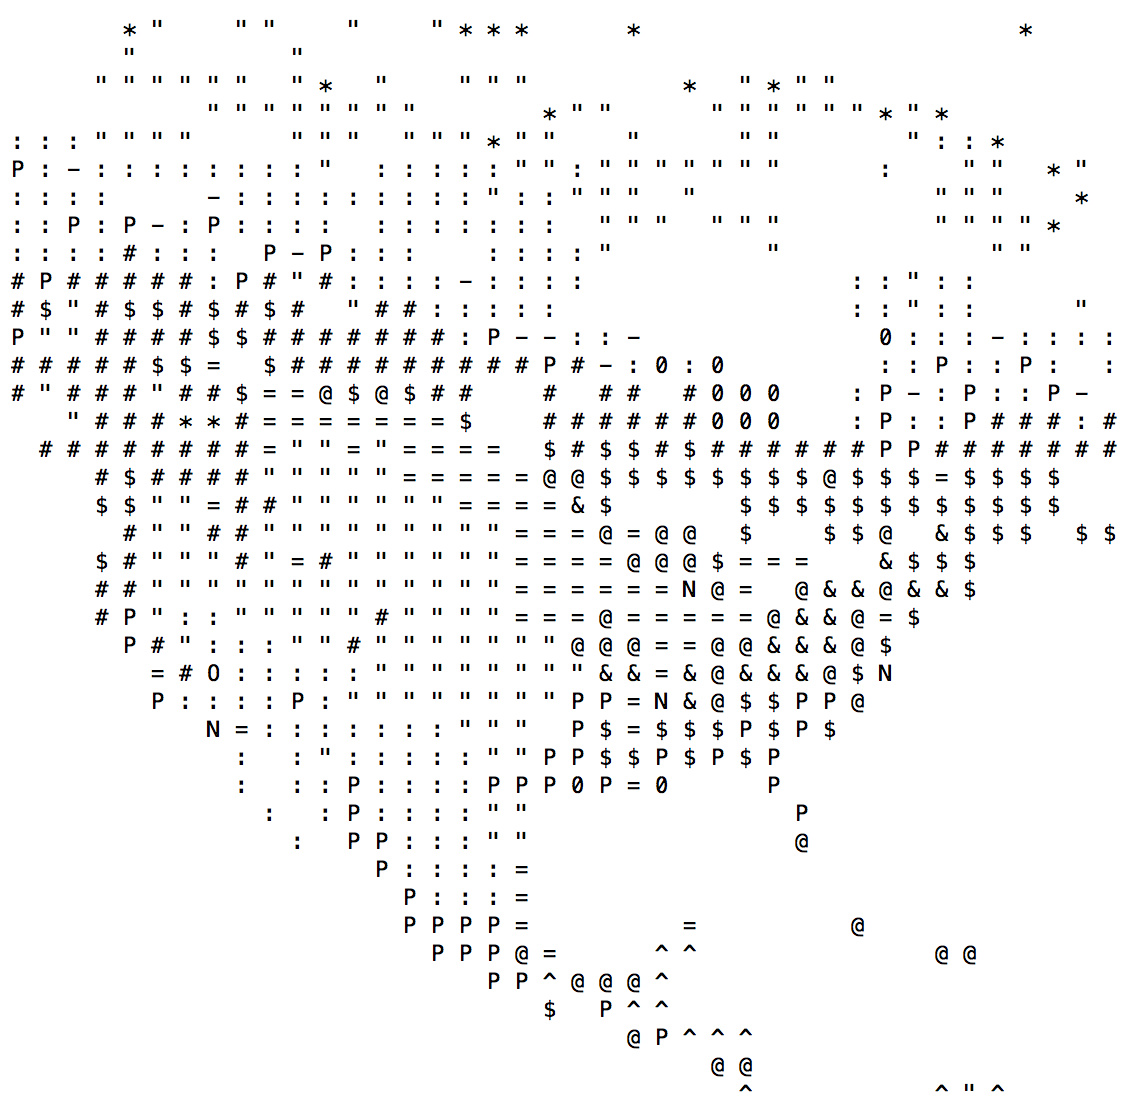
可以使用ASCII字符代替相同的数据进行渲染
$ gj2ascii \
    --bbox -130 9 -61.5 77 \
    --width 80 \
    0.shp -c ' ' \
    1.shp -c \# \
    2.shp -c \^ \
    3.shp -c + \
    4.shp -c \& \
    5.shp -c \$ \
    6.shp -c \% \
    7.shp -c \: \
    8.shp -c P \
    9.shp -c - \
    10.shp -c \" \
    11.shp -c 0 \
    12.shp -c = \
    13.shp -c N \
    14.shp -c \@ \
    15.shp -c \* \
    16.shp -c O
其他示例
请参阅示例目录以获取更多信息以及更复杂的示例,但以下是一些开始的好地方。一些示例包括在命令行或Python中运行时会被着色的输出,但RST无法渲染ANSI代码。
渲染两层,一层从stin读取,另一层直接从文件读取,跨越20个像素,同时显式指定每一层的字符和颜色以及背景填充,并放大感兴趣的区域。
$ cat sample-data/polygons.geojson | gj2ascii - \
    sample-data/lines.geojson \
    --bbox sample-data/small-aoi-polygon-line.geojson \
    --width 20 \
    --char ^=red \
    --char -=blue \
    --fill .=green
. . . . . . - . . . . . . . . . ^ ^ ^ ^
. . . . . - . . . . . . . . . . . ^ ^ ^
. . . . - . . . . . . . . . . . . . - -
. . . . - . . . . . . . . - - - - - . ^
^ ^ . - . . . . . . . . . . . . . . . .
^ ^ - . . . . . . . . . . . . . . . . .
^ - ^ . . . . . . . . . . . . . . . . .
^ - . . . . . . . . . . . . . . . . . .
- ^ . . . . . . - . . . . . ^ . . . . .
. - . . . . . . - - . . . ^ ^ . . . . .
. . - . . . . . - . - . ^ ^ ^ . . . . .
. . . - . . . . - . . - ^ ^ ^ . . . . .
. . . . - . . - . . ^ ^ - ^ ^ . . . . .
. . . . . - . - . ^ ^ ^ ^ - ^ . . . . .
. . . . . . - - ^ ^ ^ ^ ^ ^ - . . . . .在10个像素内渲染单个要素,并显示两个字段的属性,即COUNTYFP和NAME。
$ gj2ascii sample-data/WV.geojson \
    --iterate \
    --properties COUNTYFP,NAME \
    --width 10

+----------+---------+
| COUNTYFP |     001 |
| NAME     | Barbour |
+----------+---------+

            + + +
  +   + + + + + + +
  + + + + + + + + +
+ + + + + + + + +
+ + + + + + + + + +
    + + + + + + +
        + + + +
        + + + +

Press enter for the next geometry or ^C/^D or 'q' to quit...
使用Python API重新创建第一个示例
使用Python API重新创建第一个示例有两种方法。如果用户不关心分配给哪种颜色的字符,请使用此方法
import fiona as fio
import gj2ascii
with fio.open('sample-data/polygons.geojson') as poly, \
        fio.open('sample-data/lines.geojson') as lines, \
        fio.open('sample-data/small-aoi-polygon-line.geojson') as bbox:
    layermap = [
        (poly, 'red'),
        (lines, 'blue')
    ]
    print(gj2ascii.style_multiple(layermap, 20, fill='green', bbox=bbox.bounds))
0 0 0 0 0 0 1 0 0 0 0 0 0 0 0 0 2 2 2 2
0 0 0 0 0 1 0 0 0 0 0 0 0 0 0 0 0 2 2 2
0 0 0 0 1 0 0 0 0 0 0 0 0 0 0 0 0 0 1 1
0 0 0 0 1 0 0 0 0 0 0 0 0 1 1 1 1 1 0 2
2 2 0 1 0 0 0 0 0 0 0 0 0 0 0 0 0 0 0 0
2 2 1 0 0 0 0 0 0 0 0 0 0 0 0 0 0 0 0 0
2 1 2 0 0 0 0 0 0 0 0 0 0 0 0 0 0 0 0 0
2 1 0 0 0 0 0 0 0 0 0 0 0 0 0 0 0 0 0 0
1 2 0 0 0 0 0 0 1 0 0 0 0 0 2 0 0 0 0 0
0 1 0 0 0 0 0 0 1 1 0 0 0 2 2 0 0 0 0 0
0 0 1 0 0 0 0 0 1 0 1 0 2 2 2 0 0 0 0 0
0 0 0 1 0 0 0 0 1 0 0 1 2 2 2 0 0 0 0 0
0 0 0 0 1 0 0 1 0 0 2 2 1 2 2 0 0 0 0 0
0 0 0 0 0 1 0 1 0 2 2 2 2 1 2 0 0 0 0 0
0 0 0 0 0 0 1 1 2 2 2 2 2 2 1 0 0 0 0 0
如果用户关心分配给每一层的字符,请使用此方法
import fiona as fio
import gj2ascii

with fio.open('sample-data/polygons.geojson') as poly, \
        fio.open('sample-data/lines.geojson') as lines, \
        fio.open('sample-data/small-aoi-polygon-line.geojson') as bbox:

    # Render each layer individually with the same bbox and width
    # The fill will be assigned in the next step but must be a single space here
    rendered_layers = [
        gj2ascii.render(poly, 20, char='^', fill=' ', bbox=bbox.bounds),
        gj2ascii.render(lines, 20, char='-', fill=' ', bbox=bbox.bounds)
    ]

    # Overlay the rendered layers into one stack
    stacked = gj2ascii.stack(rendered_layers, fill='.')

    # Apply the colors and print
    colormap = {
        '^': 'red',
        '-': 'blue',
        '.': 'green'
    }
    print(gj2ascii.style(stacked, colormap))
. . . . . . - . . . . . . . . . ^ ^ ^ ^
. . . . . - . . . . . . . . . . . ^ ^ ^
. . . . - . . . . . . . . . . . . . - -
. . . . - . . . . . . . . - - - - - . ^
^ ^ . - . . . . . . . . . . . . . . . .
^ ^ - . . . . . . . . . . . . . . . . .
^ - ^ . . . . . . . . . . . . . . . . .
^ - . . . . . . . . . . . . . . . . . .
- ^ . . . . . . - . . . . . ^ . . . . .
. - . . . . . . - - . . . ^ ^ . . . . .
. . - . . . . . - . - . ^ ^ ^ . . . . .
. . . - . . . . - . . - ^ ^ ^ . . . . .
. . . . - . . - . . ^ ^ - ^ ^ . . . . .
. . . . . - . - . ^ ^ ^ ^ - ^ . . . . .
. . . . . . - - ^ ^ ^ ^ ^ ^ - . . . . .
分页浏览要素
import fiona as fio
import gj2ascii

with fio.open('sample-data/WV.geojson') as src:
    for feature in gj2ascii.paginate(src, 10, properties=['COUNTYFP', 'NAME']):
        print(feature)
+----------+---------+
| COUNTYFP |     001 |
| NAME     | Barbour |
+----------+---------+

            + + +
  +   + + + + + + +
  + + + + + + + + +
+ + + + + + + + +
+ + + + + + + + + +
    + + + + + + +
        + + + +
        + + + +
安装
通过pip
$ pip install gj2ascii --upgrade从master分支
$ git clone https://github.com/geowurster/gj2ascii.git
$ cd gj2ascii
$ python setup.py install
启用emoji
$ pip install gj2ascii[emoji]依赖关系
对于此类工具,依赖关系相当庞大,可能需要一些额外的工作来安装所有内容。所有依赖项都应自动安装,但有一些潜在的问题包。手动安装以下内容可能有助于
某些Linux发行版在安装rasterio之前需要额外的步骤:apt-get install python-numpy-dev libgdal1h libgdal-dev。
开发
$ git clone https://github.com/geowurster/gj2ascii.git
$ cd gj2ascii
$ virtualenv venv
$ source venv/bin/activate
$ pip install -e .[all]
$ py.test gj2ascii --cov gj2ascii --cov-report term-missing
许可证
见LICENSE.txt。
项目详情
gj2ascii-0.4.1.tar.gz的哈希值
| 算法 | 哈希摘要 | |
|---|---|---|
| SHA256 | 65c865410aecd6e4698a120b47531171ee4bc89a511c301c770393f4884ffe8e |
|
| MD5 | 887274b006171a18da25fba003430983 |
|
| BLAKE2b-256 | 12bb7ba7b05bf43b334d5a2b7f84844279f377456512adba7634585f3d97e13e |


