适用于PyTorch的快速语义分割

项目描述
快速语义分割

该仓库旨在为PyTorch提供针对移动设备的准确实时语义分割代码,并在Cityscapes上预训练权重。这可以用于在各种现实世界街道图像上的高效分割,包括Mapillary Vistas、KITTI和CamVid等数据集。
from fastseg import MobileV3Large
model = MobileV3Large.from_pretrained().cuda().eval()
model.predict(images)
这些模型是基于修改后的基于LR-ASPP的分割头实现的
目前,您可以执行以下操作
- 加载预训练的MobileNetV3语义分割模型。
- 轻松生成街道场景的硬分割标签或软概率。
- 在Cityscapes或您自己的数据集上评估MobileNetV3模型。
- 使用ONNX导出模型以进行生产。
如果您有任何功能请求或问题,请随时在GitHub issues中留言!
目录
新增功能?
2020年9月29日
- 发布了语义分割模型的训练代码
2020年8月12日
- 为
MobileV3Small添加了256个滤波器的预训练权重
2020年8月11日
- 初始发布
- 实现了带有LR-ASPP的
MobileV3Large和MobileV3Small - 带有128/256个滤波器的
MobileV3Large和带有64/128个滤波器的MobileV3Small预训练权重 - 推理、ONNX导出和优化脚本
概述
这是介绍MobileNetV3的原始论文[链接]的摘录
本文开始探讨自动化搜索算法和网络设计如何共同工作,以利用互补方法提高整体的最佳状态。通过这个过程,我们创建了两个新的MobileNet模型进行发布:MobileNetV3-Large和MobileNetV3-Small,它们针对高资源和低资源使用场景。然后,将这些模型应用于目标检测和语义分割任务。
对于语义分割(或任何密集像素预测)任务,我们提出了一个新的高效分割解码器Lite Reduced Atrous Spatial Pyramid Pooling(LR-ASPP)。我们在移动分类、检测和分割方面实现了新的最佳状态结果。
MobileNetV3-Large LRASPP在Cityscapes分割中与MobileNetV2 R-ASPP具有相似精度的情况下,速度提高了34%

这个项目试图忠实于实现MobileNetV3用于实时语义分割,目标是高效、易于使用和可扩展。
要求
此代码需要Python 3.7或更高版本。它已测试与PyTorch版本1.5和1.6兼容。要安装此包,请简单地运行pip install fastseg。然后您可以开始使用预训练模型
# Load a pretrained MobileNetV3 segmentation model in inference mode
from fastseg import MobileV3Large
model = MobileV3Large.from_pretrained().cuda()
model.eval()

# Open a local image as input
from PIL import Image
image = Image.open('street_image.png')

# Predict numeric labels [0-18] for each pixel of the image
labels = model.predict_one(image)
下面给出了更多详细的示例。作为替代方案,您可以在项目根目录中运行pip install -r requirements.txt来克隆此存储库并安装geffnet包(以及其他依赖项),而不是通过pip安装fastseg。
预训练模型和指标
我能够训练一些模型,其精度接近或超过了原始搜索MobileNetV3论文中描述的精度。每个模型仅使用Cityscapes的gtFine标签进行训练,大约12小时,在一个Nvidia DGX-1节点上,使用8个V100 GPU。
| 模型 | 分割头部 | 参数 | mIoU | 推理 | TensorRT | 权重? |
|---|---|---|---|---|---|---|
MobileV3Large |
LR-ASPP,F=256 | 3.6M | 72.3% | 21.1 FPS | 30.7 FPS | ✔ |
MobileV3Large |
LR-ASPP,F=128 | 3.2M | 72.3% | 25.7 FPS | 37.3 FPS | ✔ |
MobileV3Small |
LR-ASPP,F=256 | 1.4M | 67.8% | 30.3 FPS | 39.4 FPS | ✔ |
MobileV3Small |
LR-ASPP,F=128 | 1.1M | 67.4% | 38.2 FPS | 52.4 FPS | ✔ |
MobileV3Small |
LR-ASPP,F=64 | 1.0M | 66.9% | 46.5 FPS | 61.9 FPS | ✔ |
精度与原始论文的精度相差0.3%,原始论文报告了Cityscapes val集上72.6%的mIoU和3.6M个参数。推理测试是在单个V100 GPU上进行的,以全分辨率2MP图像(1024 x 2048)作为输入。它在半分辨率(512 x 1024)图像上运行速度大约快4倍。
"TensorRT"列显示了将优化的ONNX模型导出到Nvidia TensorRT后的基准测试。性能是通过取100次迭代的平均GPU延迟来衡量的。
用法
运行推理
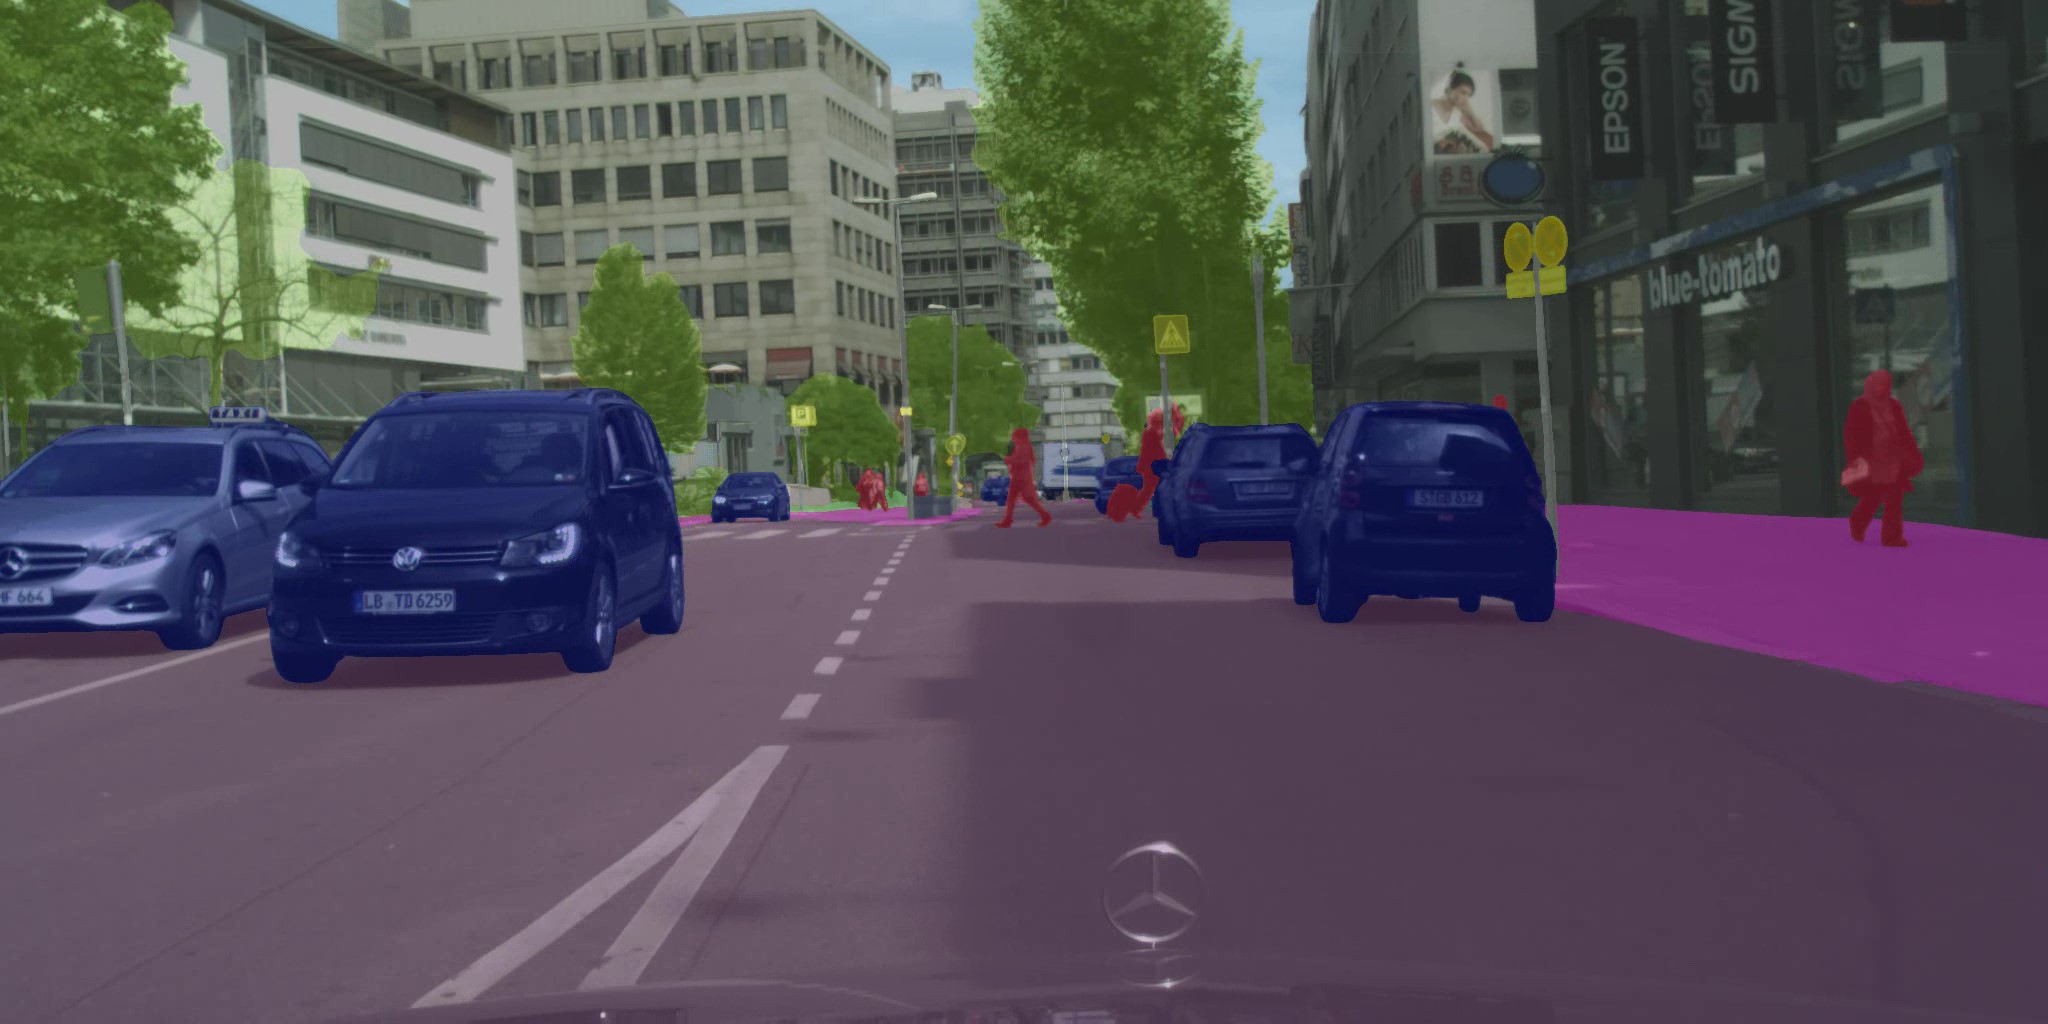
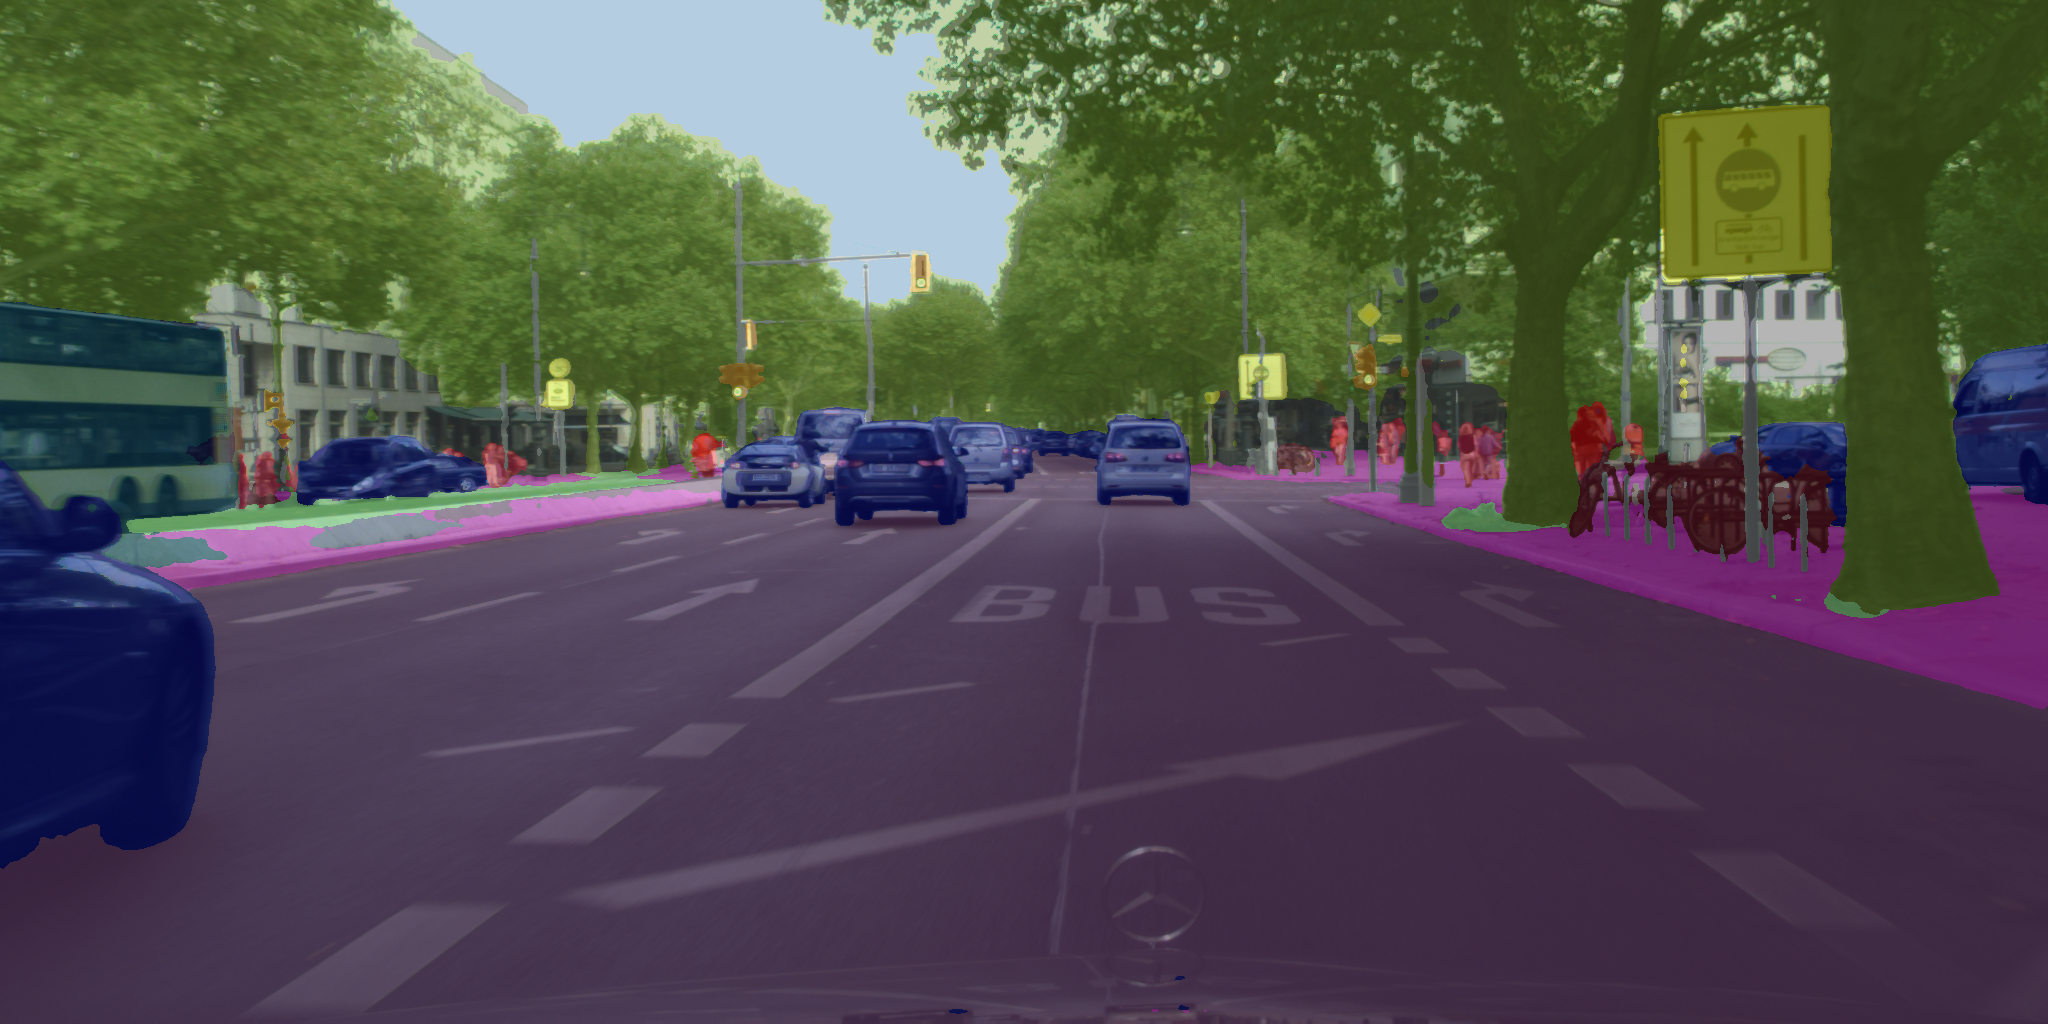
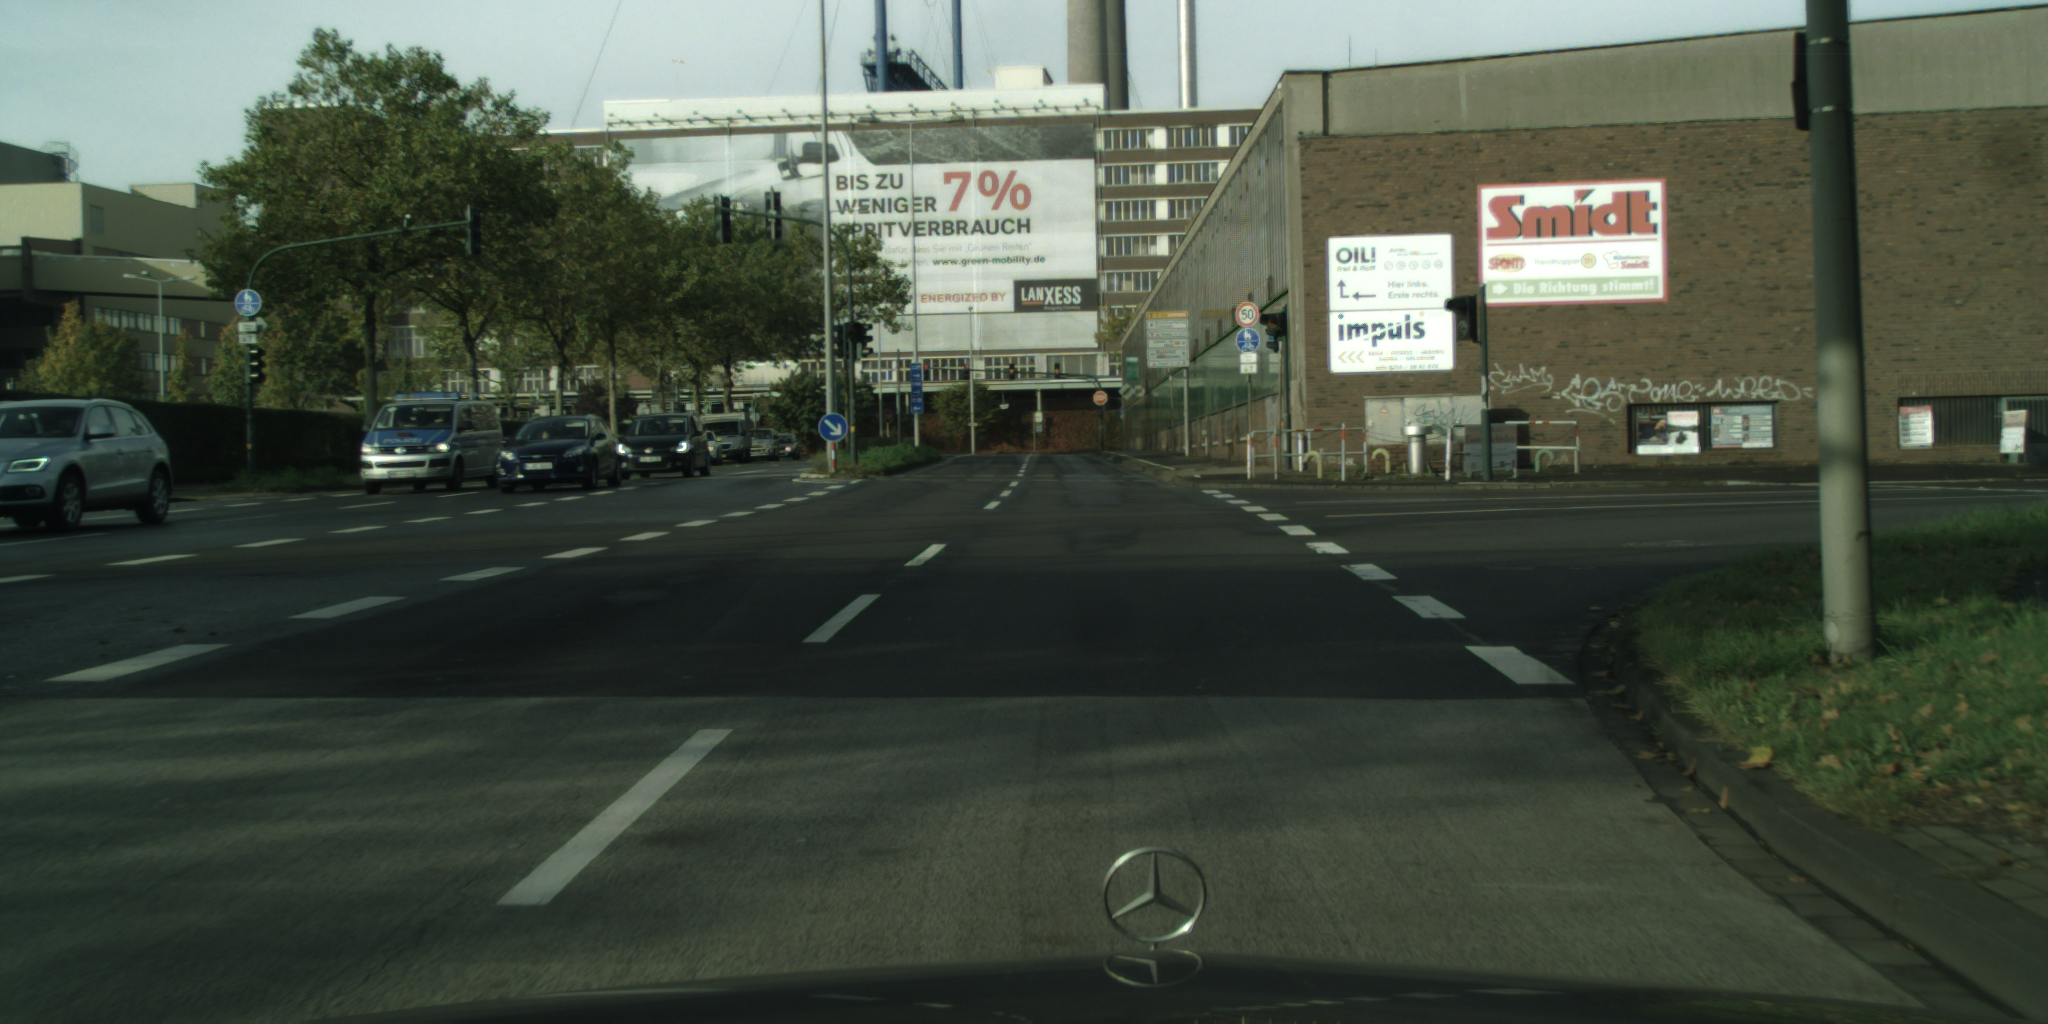
开始推理的最简单方法是克隆此存储库并使用infer.py脚本。例如,如果您有名为city_1.png和city_2.png的街道图像,则可以使用以下命令为它们生成分割标签。
$ python infer.py city_1.png city_2.png
输出
==> Creating PyTorch MobileV3Large model
==> Loading images and running inference
Loading city_1.png
Generated colorized_city_1.png
Generated composited_city_1.png
Loading city_2.png
Generated colorized_city_2.png
Generated composited_city_2.png
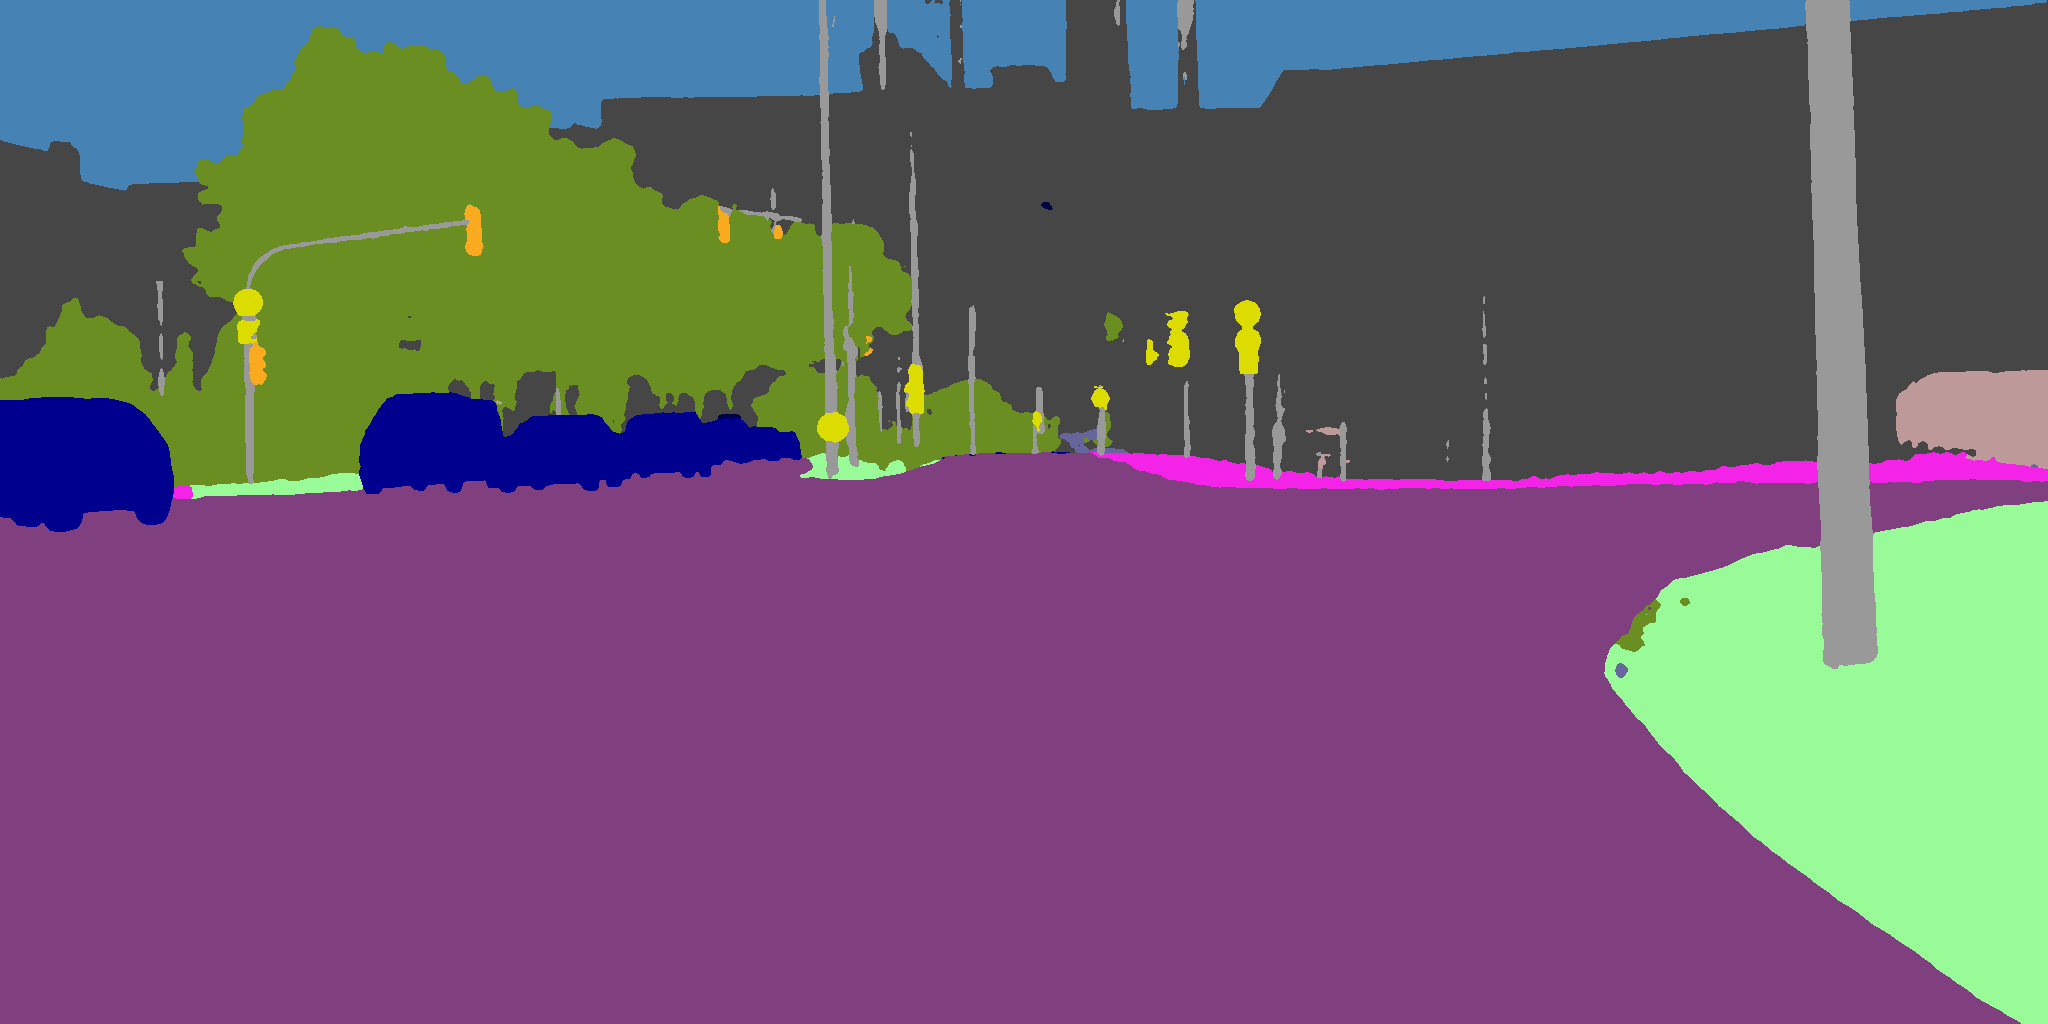
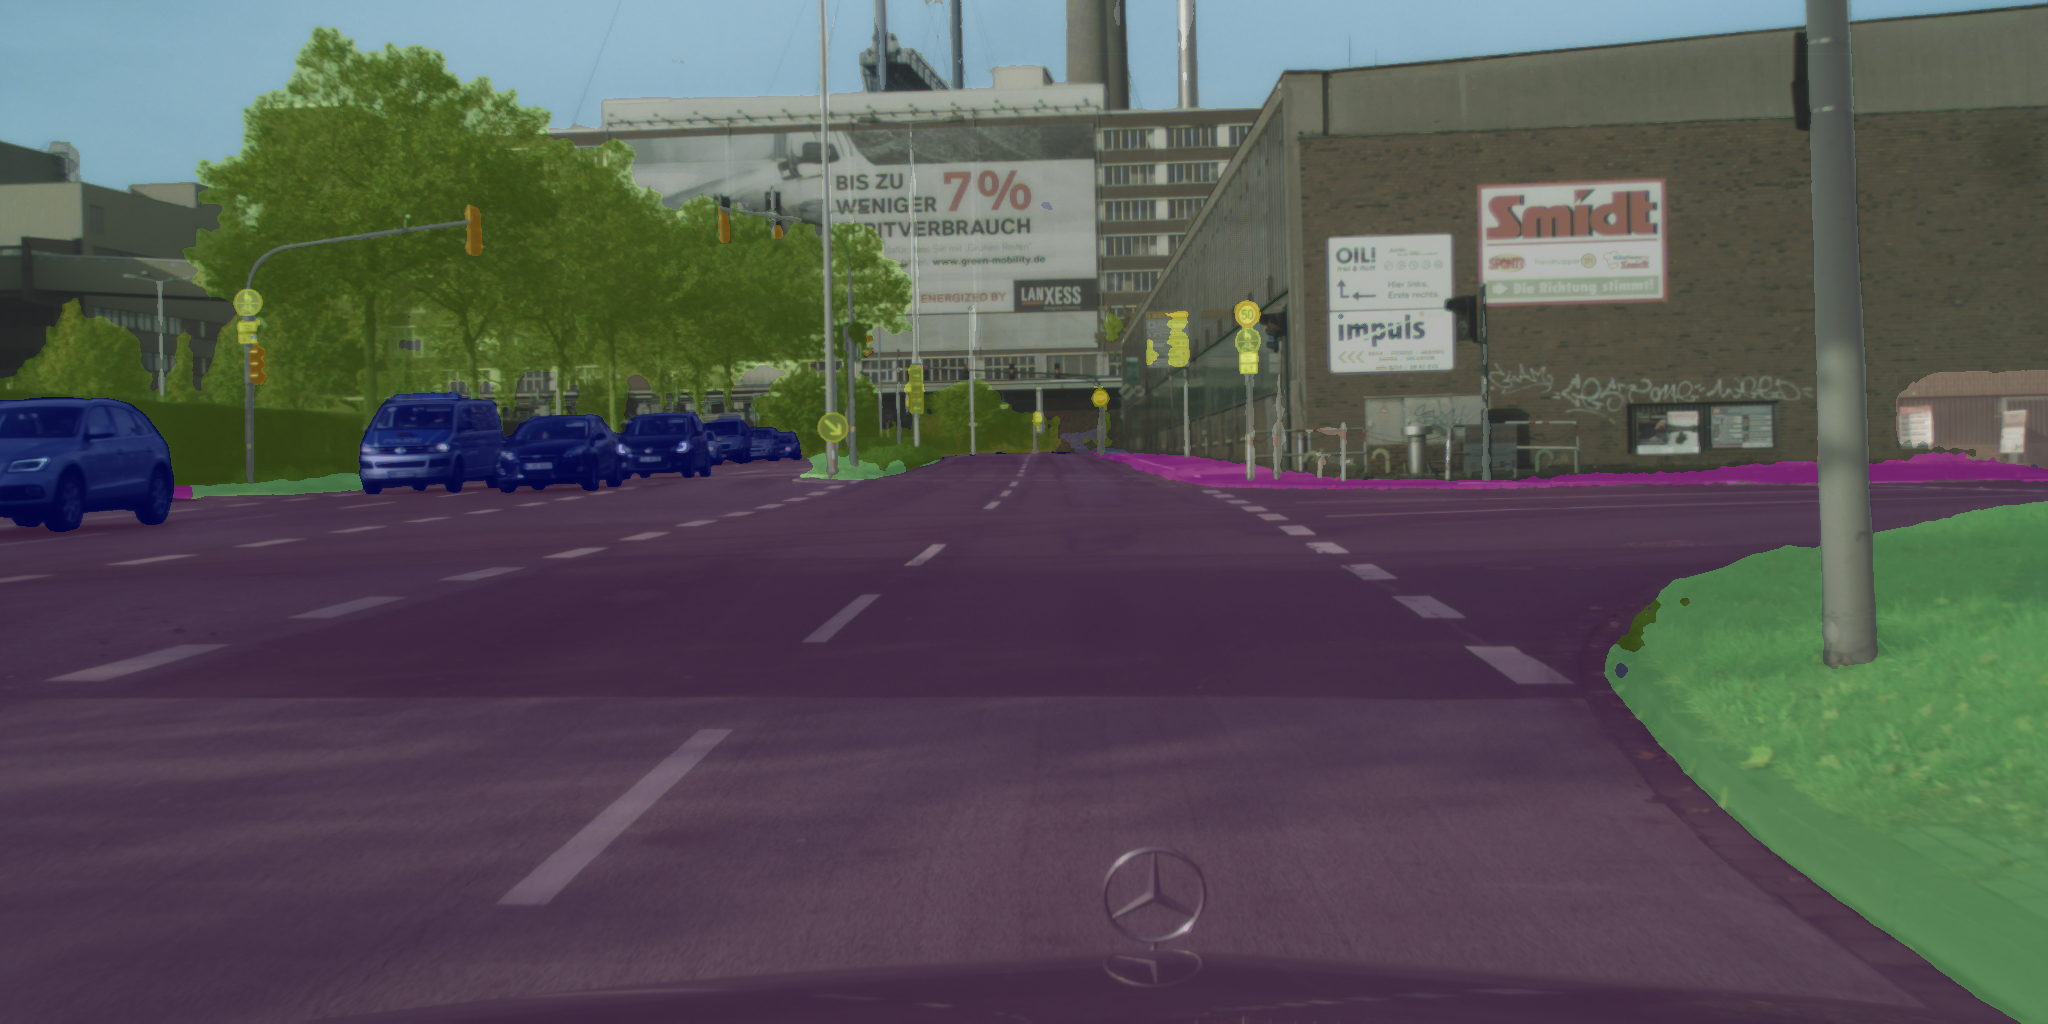
| 原始 | 彩色化 | 合成 |
|---|---|---|
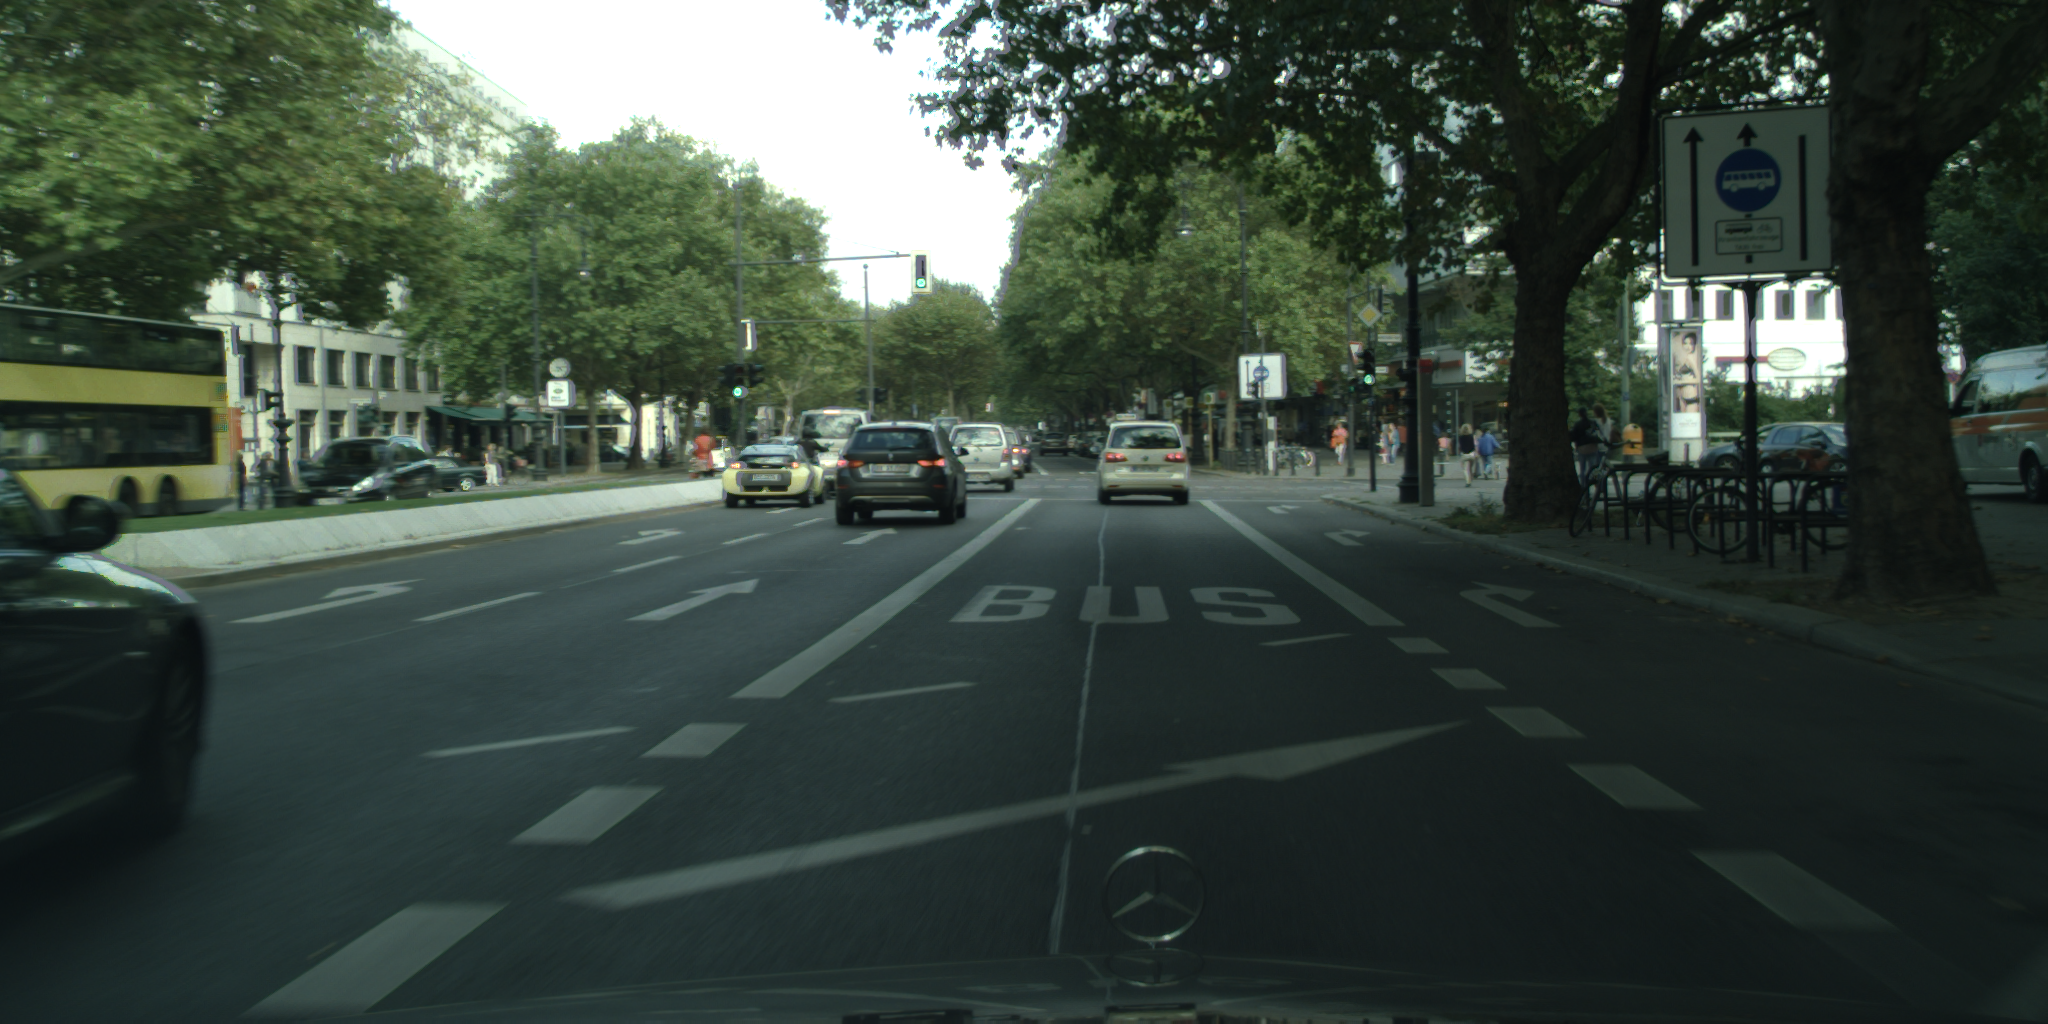 |
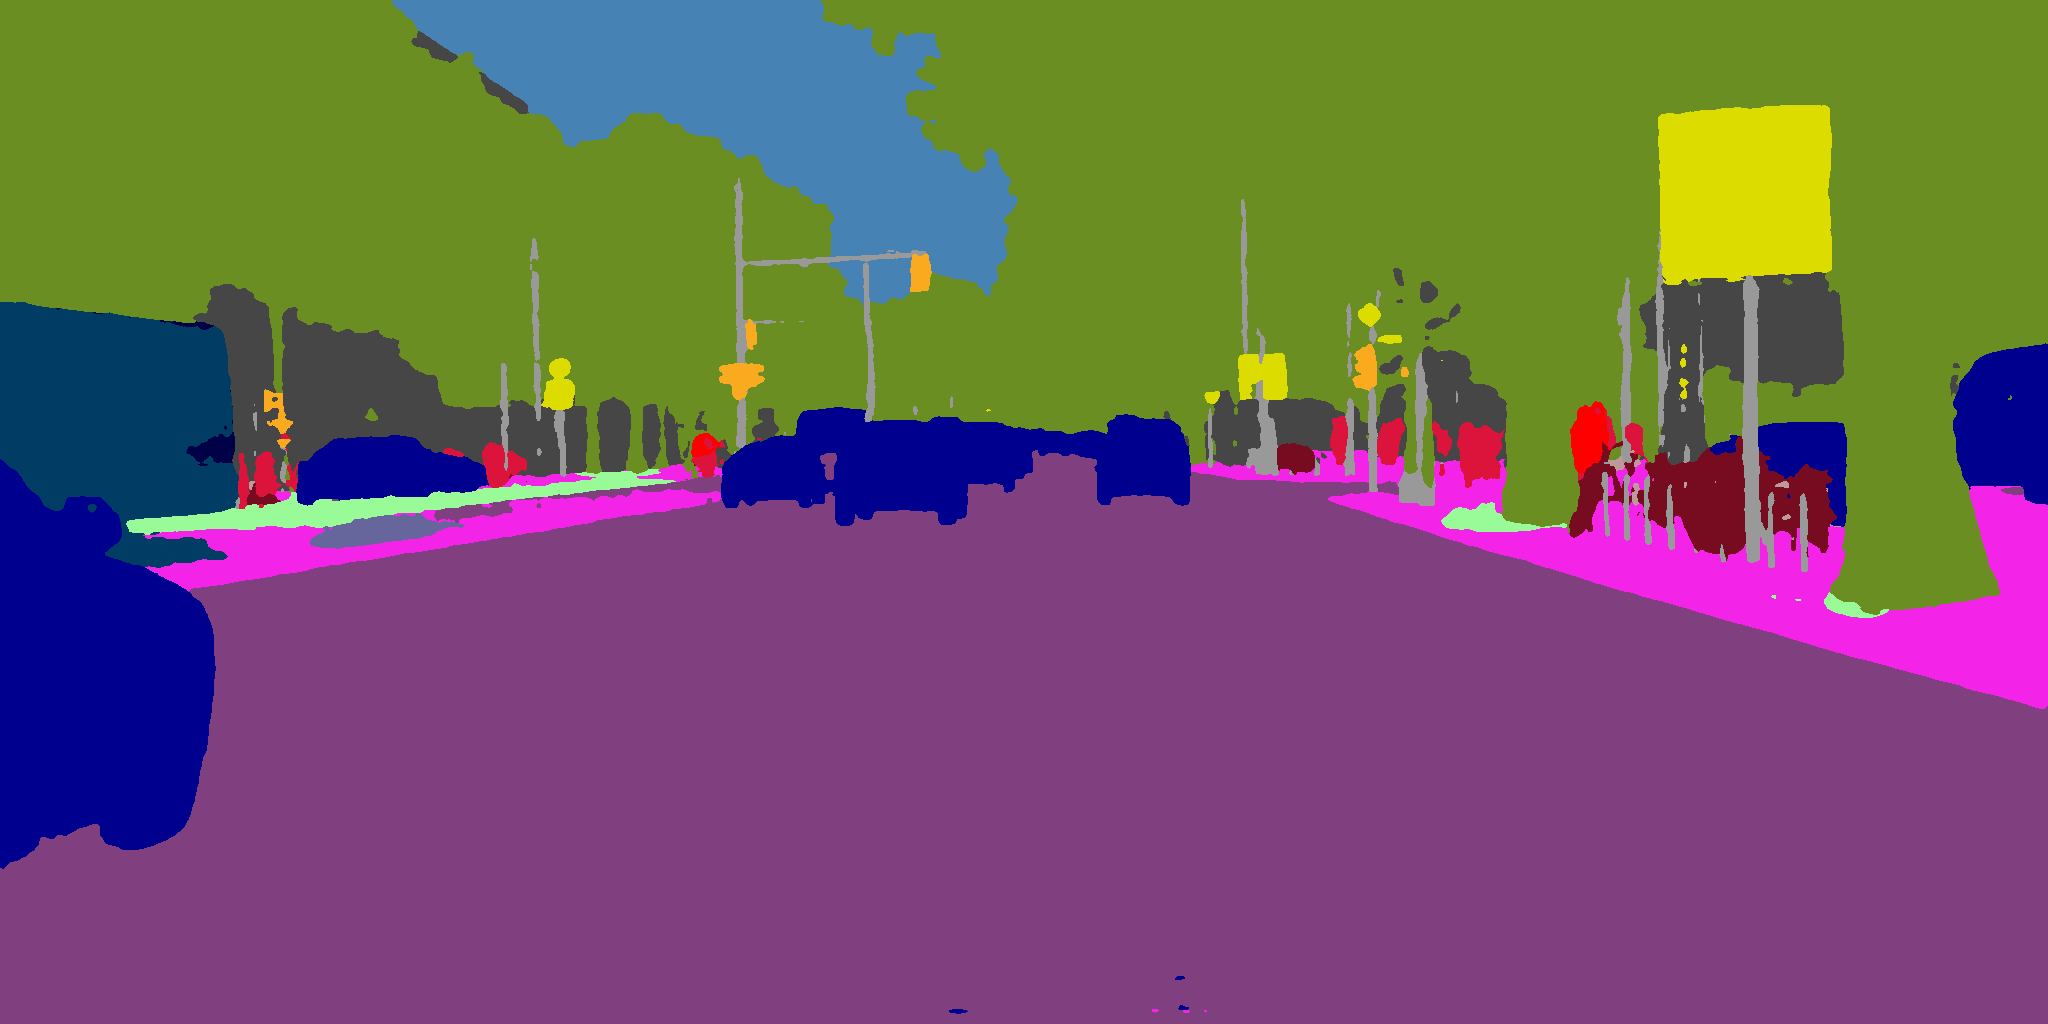 |
 |
 |
 |
 |
要编程方式与模型交互,首先按照上述说明使用pip安装fastseg包。然后,您可以在自己的Python代码中导入和构建模型,这些模型是PyTorch nn.Module的实例。
from fastseg import MobileV3Large, MobileV3Small

# Load a pretrained segmentation model
model = MobileV3Large.from_pretrained()

# Load a segmentation model from a local checkpoint
model = MobileV3Small.from_pretrained('path/to/weights.pt')

# Create a custom model with random initialization
model = MobileV3Large(num_classes=19, use_aspp=False, num_filters=256)
要在图像或图像批上运行推理,您可以使用 model.predict_one() 和 model.predict() 方法,分别进行操作。这些方法会为您处理预处理和输出解释;它们以 PIL 图像或 NumPy 数组作为输入,并返回 NumPy 数组。
(您也可以直接使用 model.forward() 进行推理,这将返回包含 logit 的张量,但请确保输入数据的均值为 0,方差为 1。)
import torch
from PIL import Image
from fastseg import MobileV3Large, MobileV3Small

# Construct a new model with pretrained weights, in evaluation mode
model = MobileV3Large.from_pretrained().cuda()
model.eval()

# Run inference on an image
img = Image.open('city_1.png')
labels = model.predict_one(img) # returns a NumPy array containing integer labels
assert labels.shape == (1024, 2048)

# Run inference on a batch of images
img2 = Image.open('city_2.png')
batch_labels = model.predict([img, img2]) # returns a NumPy array containing integer labels
assert batch_labels.shape == (2, 1024, 2048)

# Run forward pass directly
dummy_input = torch.randn(1, 3, 1024, 2048, device='cuda')
with torch.no_grad():
    dummy_output = model(dummy_input)
assert dummy_output.shape == (1, 19, 1024, 2048)
输出标签可以使用彩色和合成图像进行可视化。
from fastseg.image import colorize, blend

colorized = colorize(labels) # returns a PIL Image
colorized.show()

composited = blend(img, colorized) # returns a PIL Image
composited.show()
导出到ONNX
可以使用 onnx_export.py 脚本将预训练的分割模型转换为 ONNX 格式。导出时,您应指定图像输入尺寸。以下是使用说明。
$ python onnx_export.py --help
usage: onnx_export.py [-h] [--model MODEL] [--num_filters NUM_FILTERS]
                      [--size SIZE] [--checkpoint CHECKPOINT]
                      OUTPUT_FILENAME

Command line script to export a pretrained segmentation model to ONNX.

positional arguments:
  OUTPUT_FILENAME       filename of output model (e.g.,
                        mobilenetv3_large.onnx)

optional arguments:
  -h, --help            show this help message and exit
  --model MODEL, -m MODEL
                        the model to export (default MobileV3Large)
  --num_filters NUM_FILTERS, -F NUM_FILTERS
                        the number of filters in the segmentation head
                        (default 128)
  --size SIZE, -s SIZE  the image dimensions to set as input (default
                        1024,2048)
  --checkpoint CHECKPOINT, -c CHECKPOINT
                        filename of the weights checkpoint .pth file (uses
                        pretrained by default)
onnx_optimize.py 脚本可以优化导出的模型。如果您打算将模型部署到 TensorRT 或移动设备,您可能还需要通过 onnx-simplifier 运行。
从头开始训练
有关本项目中使用的训练代码以及如何训练自定义模型的文档,请参阅 ekzhang/semantic-segmentation 仓库。
贡献
欢迎提交拉取请求!衷心感谢 NVIDIA ADLR 的 Andrew Tao 和 Karan Sapra 提供的有益讨论和训练代码,以及 Branislav Kisacanin 的帮助,没有他们这项工作将无法完成。
感谢以下人士的建议:Ching Hung、Eric Viscito、Franklyn Wang、Jagadeesh Sankaran 和 Zoran Nikolic。
MIT 许可协议下发布。


下载文件
下载适用于您平台的应用程序。如果您不确定选择哪个,请了解更多关于 安装包 的信息。


