Django的简单邮件队列


项目描述


Django Mail Queue
这是由Privex Inc.维护的http://github.com/dstegelman/django-mail-queue项目的分支
Derek于2019年9月17日将原始django-mail-queue PyPi软件包的所有权转让给Privex
Privex在原始PyPi软件包django-mail-queue下发布了这个分支(自v3.2.0版起)。
自2018年12月以来,Privex一直在积极维护这个分支,包括修复错误和添加新功能。
如果我们的分支版本帮助了您,请考虑从Privex购买VPS或专用服务器——价格低至每月仅0.99美元(是的,每月99美分,我们还接受加密货币!)
邮件队列提供了一个简单快捷的方式来发送电子邮件。每封电子邮件都会实时或使用Celery保存并排队。一如既往,欢迎反馈、错误报告和建议。
安装
django-mail-queue 具有高度兼容性,从Django 1.8的Python 2.7到Django 2.2的Python 3.7。
要检查兼容性,请参阅Travis CI,它会在各种Python和Django版本上运行单元测试。
使用pip从PyPi下载和安装(推荐)
pip3 install django-mail-queue
(替代方案)从Git手动安装
选项1 - 使用pip直接从GitHub安装
pip3 install git+https://github.com/Privex/django-mail-queue
选项2 - 克隆并手动安装
# Clone the repository from Github
git clone https://github.com/Privex/django-mail-queue
cd django-mail-queue

# RECOMMENDED MANUAL INSTALL METHOD
# Use pip to install the source code
pip3 install .

# ALTERNATIVE MANUAL INSTALL METHOD
# If you don't have pip, or have issues with installing using it, then you can use setuptools instead.
python3 setup.py install
快速入门
基本配置
首先将包安装到您的项目中(见上文)。
打开settings.py文件,并将mailqueue添加到INSTALLED_APPS中
INSTALLED_APPS = (
    'mailqueue',
)
添加以下设置,并根据需要调整
# If you're using Celery, set this to True
MAILQUEUE_CELERY = False

# Enable the mail queue. If this is set to False, the mail queue will be disabled and emails will be
# sent immediately instead.
MAILQUEUE_QUEUE_UP = True

# Maximum amount of emails to send during each queue run
MAILQUEUE_LIMIT = 50

# If MAILQUEUE_STORAGE is set to True, will ignore your default storage settings
# and use Django's filesystem storage instead (stores them in MAILQUEUE_ATTACHMENT_DIR)
MAILQUEUE_STORAGE = False
MAILQUEUE_ATTACHMENT_DIR = 'mailqueue-attachments'
运行迁移
一旦将mailqueue添加到您的INSTALLED_APPS中并在settings.py中进行了基本配置,运行迁移以创建所需的表
python manage.py migrate
以编程方式使用队列的基本用法
只需使用MailerMessage将电子邮件保存到数据库中,队列将在下一次运行时将其提取。
from mailqueue.models import MailerMessage

my_email = "dave@example.com"
my_name = "Dave Johnston"
content = """
Dear John,

This is an example email from Dave.

Thanks,
Dave Johnston!
"""

msg = MailerMessage()
msg.subject = "Hello World"
msg.to_address = "john@example.com"

# For sender names to be displayed correctly on mail clients, simply put your name first
# and the actual email in angle brackets
# The below example results in "Dave Johnston <dave@example.com>"
msg.from_address = '{} <{}>'.format(my_name, my_email)

# As this is only an example, we place the text content in both the plaintext version (content)
# and HTML version (html_content).
msg.content = content
msg.html_content = content
msg.save()
触发队列运行器
要发送队列中的电子邮件(不使用Celery),请使用管理命令
# Send up to MAILQUEUE_LIMIT emails now
python manage.py send_queued_messages

# You can use --limit / -l to override the settings.py limit for a specific run
python manage.py send_queued_messages --limit 10
python manage.py send_queued_messages -l 10
如果不使用Celery,请简单地在系统中添加cron作业,每分钟(或您希望的频率)运行manage.py send_queued_messages。
文档
http://readthedocs.org/docs/django-mail-queue/en/latest/
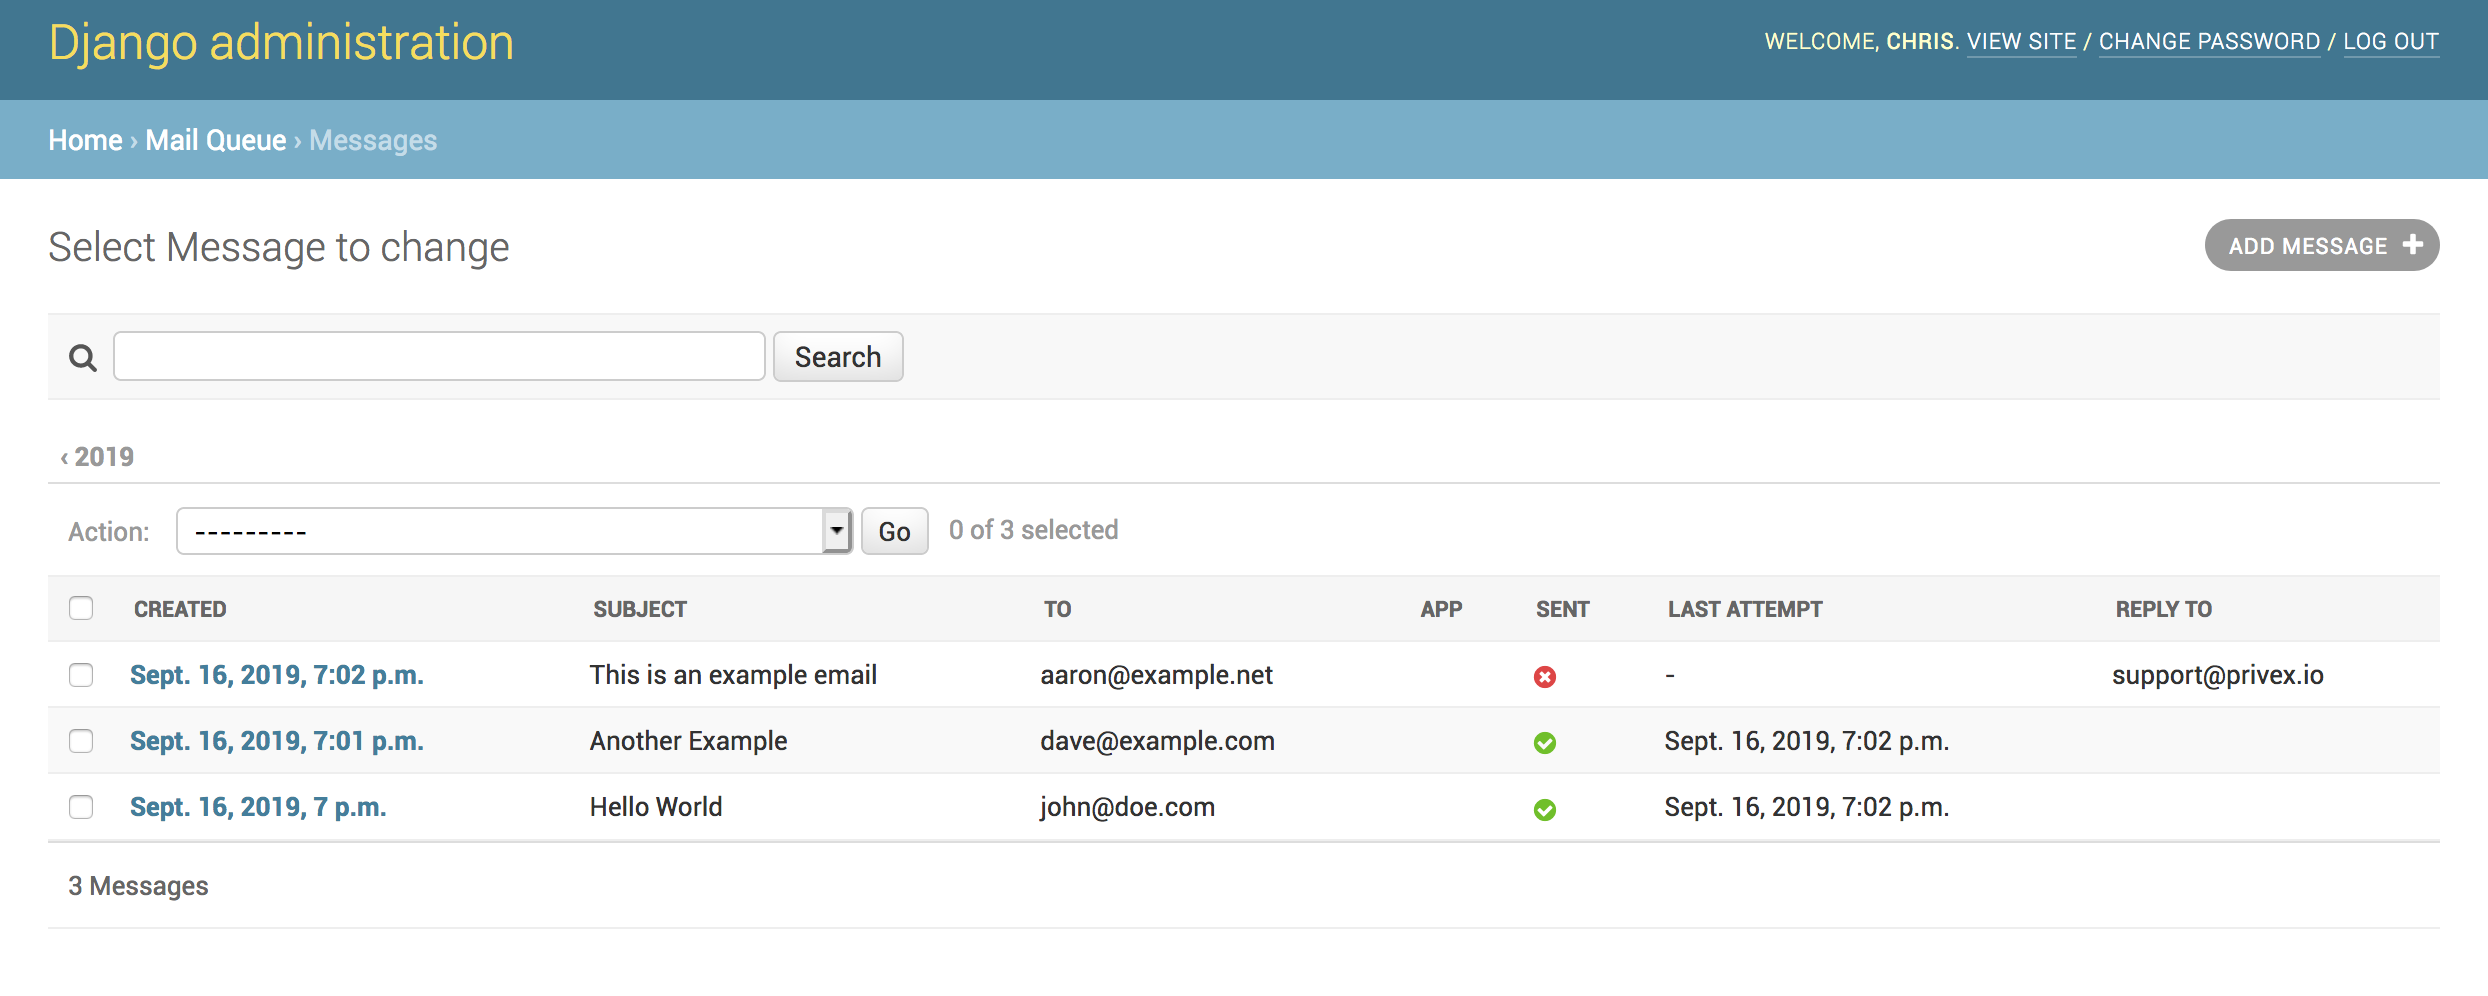
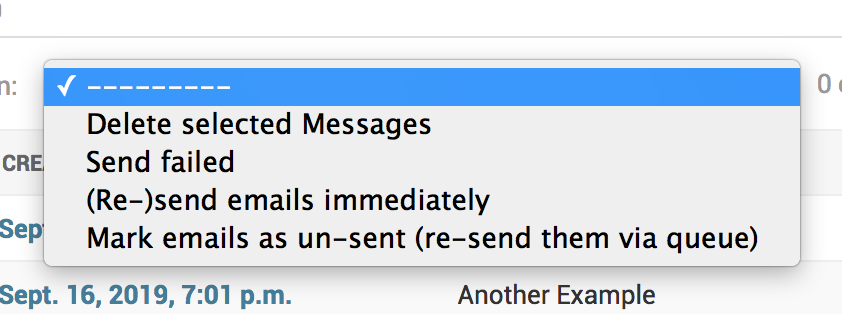
邮件队列提供了一个管理界面,可以查看所有尝试发送的电子邮件和重发失败消息的操作。
支持/帮助/垃圾邮件/仇恨邮件
如果您有任何问题/问题/建议,最快的方式是为此项目添加GitHub问题。
在本地运行测试
pip install django
pip install -r requirements.txt

py.test mailqueue

